Let’s make homemade pasta! If you have flour, two eggs, a splash of olive oil, and a bit of salt, you can do it right now. You don’t need special Italian pasta flours to make great homemade pasta, and you don’t need to worry if you don’t have a pasta maker. You can make pasta by hand with a basic rolling pin. I make pasta at home all the time, and this has become my go-to “everyday” recipe. It makes a wonderful, versatile dough that you can roll out into a range of noodles and shapes.
What you’ll find here is my basic pasta dough and process. The basics. Beyond that, I’m going to give you an earful. I’ll walk you through a number of variations and considerations down below. And I’ll include step-by-step pictures of the process of making pasta dough. You can do it by hand, with a stand maker, or with a pasta maker. Homemade pasta is absolutely one of my favorite things to make and I’m consolidating everything I’ve learned about it over the years into this one post along with links to my favorite resources. It’s an ongoing journey for me, so I’ll continue to update this. Enjoy and happy pasta making!
Homemade Pasta Equipment
Let’s start with equipment. I have opinions related to some of the pasta equipment out there and have purchased and used quite a range over the years. My takeaway? In the end, you don’t need much. Certainly not to get started. Start by making your pasta by hand first, and if you’re into it, buy an Marcato Atlas 150 hand-crank pasta maker. I’ve had mine for nearly twenty years, and with a little TLC it should last a lifetime. I make my pasta dough by hand, roll it out with the Atlas.
- Rolling Pin: If you’re starting out and making pasta by hand, a rolling pin (and a sharp knife to cut the noodles) should do the job. In a pinch, if you’re short the rolling pin, a tall water bottle could do the trick.
- Pasta Maker: My Atlas 150 pasta maker is a workhorse. You can collect different attachments over time to experiment with different pasta shapes. With a bit of practice it makes rolling pasta dough to uniform thickness a breeze. You’ll need a counter or tabletop to clamp it to. An alternative? A lot of people like to mix their dough in a stand mixer, and use the KitchenAid Pasta Roller & Cutter attachment to finish their pasta. I’ll cover how to use that down below as well.
- Pasta Drying Racks: Let me be honest, I have a range of them. Rarely use any of them. If I want to save pasta for later I freeze it (details down below). I did buy a stack of these Eppicotispai drying racks, but use them for herbs and chiles more than anything else.
- Beautiful Pasta Tools: I have a soft spot for beautiful pasta tools, and have assembled a bit of a collection. Some favorites are a traditional garganelli board, and I ask for a new LaGondola brass tool or pasta stamp each Christmas. My fantasy is that I will someday be able to use a mattarello to roll out a perfect sfoglia of uncut pasta. But my reality is that I love my Atlas, my sfolglia adventures are frustrating, and that’s where I’m at in my pasta journey.
- Spray Bottle & Dough Scraper: I’ll put these two items in the bonus category. They’re nice to have, but not necessary. I like the spray bottle to control the amount of water in my pasta dough. You don’t want your dough to get too wet, the spray bottle allows you to mist it, if necessary, to add hydration a bit at a time. The dough scraper is great for cleaning flour off countertops, wrangling run-away liquids when they break through flour walls, and cutting dough into pieces.
Homemade Pasta Ingredients
- Flour: You can make homemade pasta with many different flours. Experiment! It’s half the fun. When it comes to pasta I tend to think of flours on a spectrum of silky and fine to hearty and substantial. The type of flour you use will help dictate the personality and “grip” of your noodles, but the idea that you need super specific flours to start making wonderful, beautiful, delicious pasta is no good.
- All-purpose Flour: There’s seems to be a stigma against using all-purpose flour for homemade pasta, but I actually think it’s a great place to start. Especially if that’s what you have in your pantry right this minute. You end up with silky smooth pasta noodles that I love a number of ways. I like to pair pasta made with all-purpose flour with super simple tomato sauce, drop them into a feisty broth, they’re also great as a curry component (cook them, drain, and ladle curry broth over them). And now that you have a baseline with the all-purpose flour, you can start experimenting by using different ratios of “00”, semolina, and/or whole grain flours. And you’ll notice the differences.
- “00” flour: Powder-fine grind made with low gluten, soft wheat flour. This is what is used in most of the traditional egg pastas you encounter. It looks and almost feels like powdered sugar.
- Whole Grain Flours: Each whole-grain flour has it’s own flavor, texture, protein profile, and personality. Play around, starting with a percentage of your overall flour. I generally experiment with flours that will develop gluten – rye, spelt, farro, kamut, or whole wheat. Try 1/2 cup, or if you’re feeling bolder, go for a full cup. The recipe below calls for 2 cups of flour, so that would be half of your overall flour. See how you like it, make notes, adjust. Repeat.
- Semolina Flour: Made from durum wheat, a hard wheat, using semolina results in a stiffer pasta dough. I like this when I want my pasta to be more toothsome, textured, or more rustic. Track semolina flour down if you want to make the egg-free pasta dough (below). I’ve noticed the grinds can be subtly different between brands, for example Bob’s Red Mill Semolina is a bit sandier when compared to the more powdery Hayden Flour Mills Semolina. I’ve made delicious pasta with both, just note what you like so you can develop your own style and personal preference! When you increase the amount of semolina flour in your dough you’ll need to increase your cooking time.
- All-purpose Flour: There’s seems to be a stigma against using all-purpose flour for homemade pasta, but I actually think it’s a great place to start. Especially if that’s what you have in your pantry right this minute. You end up with silky smooth pasta noodles that I love a number of ways. I like to pair pasta made with all-purpose flour with super simple tomato sauce, drop them into a feisty broth, they’re also great as a curry component (cook them, drain, and ladle curry broth over them). And now that you have a baseline with the all-purpose flour, you can start experimenting by using different ratios of “00”, semolina, and/or whole grain flours. And you’ll notice the differences.
- Eggs: My basic, everyday pasta recipe (the one we’re working with today) calls for two eggs. I’ve made lots of pasta with a higher ratio of eggs, and I sometimes make pasta with no egg (see below) — I like two eggs. It lends little richness, color, elasticity and durability to the dough that I find makes the pasta quite versatile. Especially if I’m making a good amount of pasta for freezing later. Meaning, I’m not sure what sort of sauce or preparation I’ll do. Good quality eggs matter here.
- Extra-virgin Olive Oil: Not everyone uses olive oil in their dough. I use a touch. I feel like it helps keep the dough hydrated, and helps facilitate smooth rolling through the pasta maker rollers if you’re going that route.
- Fine-grain Sea Salt: You want to salt your pasta dough and your pasta water.
How to Make Pasta with No Eggs
I know a number of you will want to know how to make pasta with no eggs, or vegan pasta dough. No problem. I actually use a dough like this for one of my favorite pasta shapes – pici. You basically cut 1/4-inch strips of dough and roll out by hand. Eggless doughs like this aren’t typically used for pasta noodles like the other ones we’re primarily focusing on today, but for shapes like pici, cavatelli, trofie, and orecchiette. To make a pasta dough with no eggs: Combine 200g “00” flour, 200g semolina flour, 200g warm water, and 1 teaspoon fine grain sea salt. Use these ingredients and proceed with the “How to Make Pasta By Hand” instructions in the recipe section below. There is also an egg free fresh pasta recipe in Rosetta Costantino’s My Calabria made with all-purpose flour.
How To Make Pasta Dough By Hand
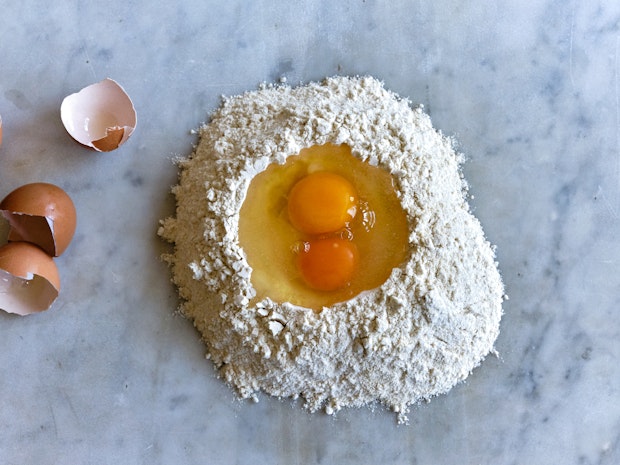
This is covered in the recipe below, but I wanted to include some reference pictures and step-by-step information. Start by making a mound of the flour directly on the countertop. Make a deep crater in the top and add the eggs, olive oil, and salt.
Use a fork to break up the eggs without breaking through the walls of your mound. You want to try to keep the eggs contained, but don’t worry if they break through – use a spatula or bench scraper to scoop them back in. Work more and more flour into the eggs a bit at a time. Drizzle 2 tablespoons of cold water across the mixture and keep mixing until you’ve got a dough coming together.
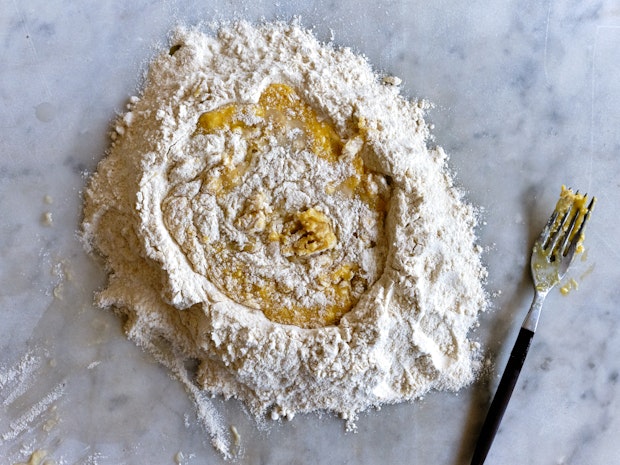
If you’re exclusively using all-purpose flour, you might not need more water. Some of the other flours are a bit thirstier, you can drizzle a bit more at time as you go if you feel like your dough is too dry. It should look like the pictures, you want to avoid having a wet dough. With some of the other flours I typically end up using 4-5 tablespoons of water total.
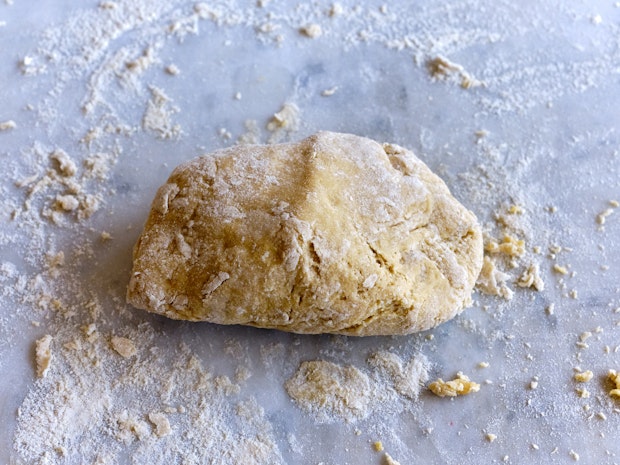
I’ve found that a spray bottle is my favorite way to add water to pasta dough without adding too much, but drizzling works too. Use your hands to bring the dough together into a bag and knead for 7-10 minutes, until the dough is silky smooth and elastic. You can see the difference in the doughs. The one pictured above hasn’t been kneaded yet, and the one below is pictured after kneading by hand for about ten minutes.

How to Roll and Cut Fresh Pasta By Hand
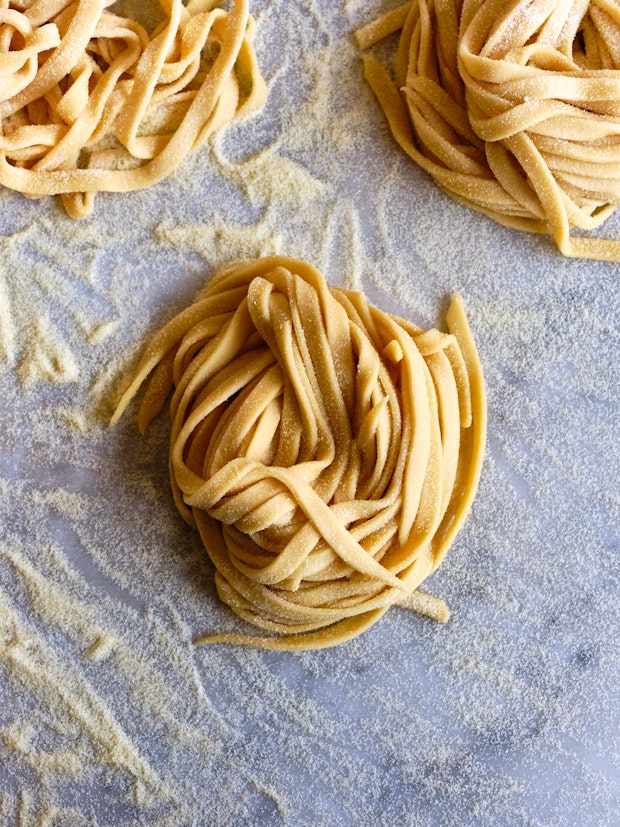
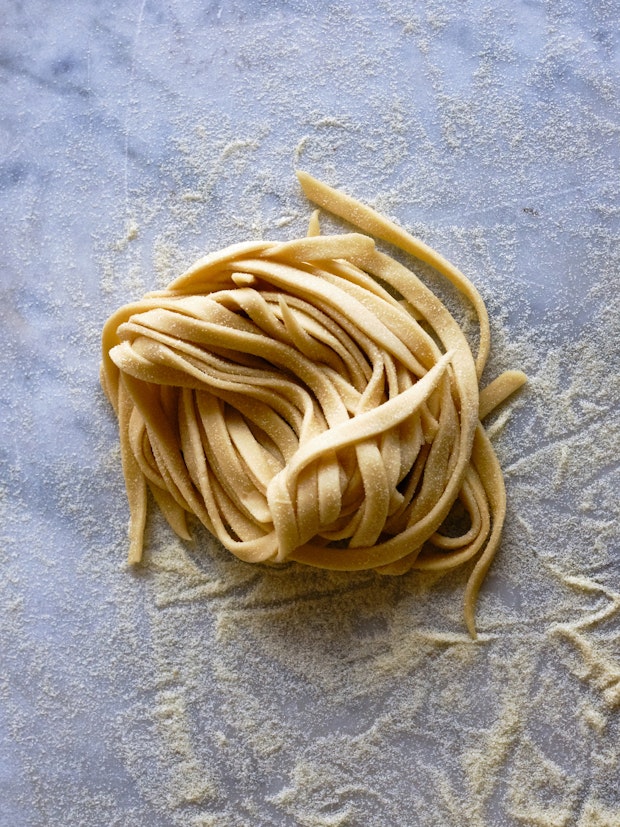
To roll out pasta dough by hand, make sure your dough is at room temperature. Cut the dough into four equal pieces. Choose one piece to work with, and immediately wrap the rest so they don’t dry out. You’ll need a floured surface, and you’ll want to keep the pasta floured a bit as well, so it doesn’t stick to itself. If the dough is sticking rub with a bit more flour. Use a rolling pin to roll the dough out to your desired thickness. I tend to go thinner than I think I’ll want because the pasta swells a bit as it cooks. Once you’ve rolled the dough out flat, to cut the dough into fettuccine (or whatever width you like), loosely fold/roll the dough into a cylinder, and cut with a sharp knife.
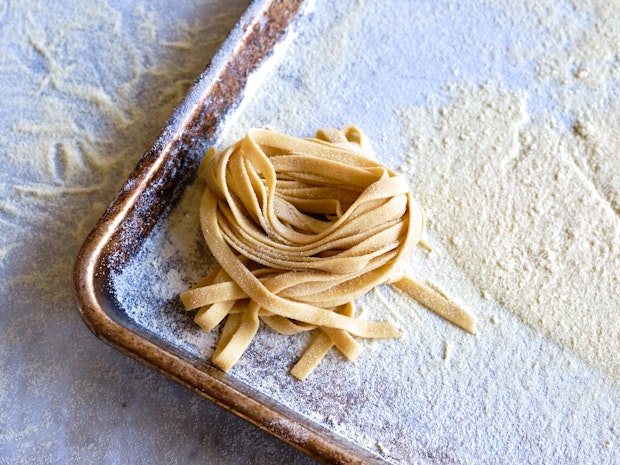
Transfer the cut pasta to a floured baking sheet, swirled into little nests. Repeat with the remaining dough.
How To Roll Out Pasta with A Pasta Maker
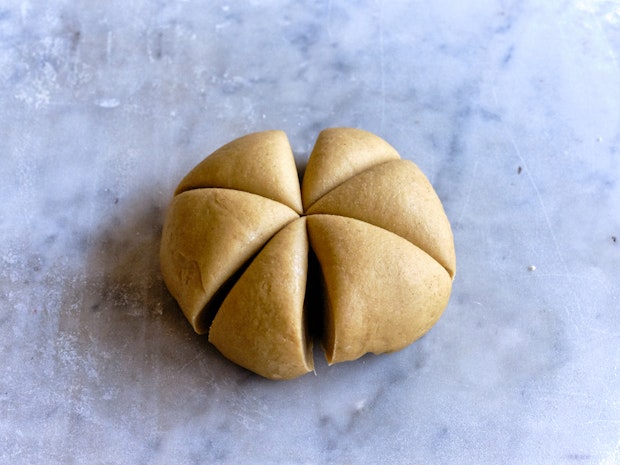
Sprinkle a baking sheet generously with flour and aside. When you’re ready to roll out the pasta, make sure your dough is at room temperature. Cut it into six equal wedges, and squish one of them flat-ish with your fingers. Re-wrap the remaining dough immediately so it doesn’t dry out.
Feed your flattened wedge though the pasta make on its widest setting. Run it though 2 or 3 times. You want to get it into a rectangular shape if possible, so at this point fold the dough in thirds so you have a rectangle. Feed it though the pasta maker 2-3 more times on the widest setting.
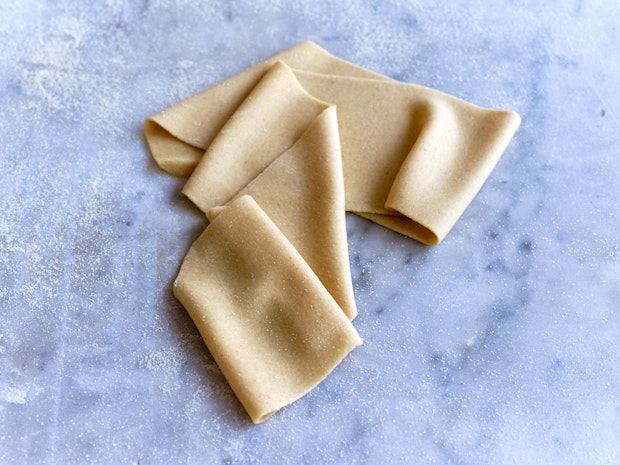
Continue to feed the pasta dough through the pasta maker, decreasing the width as you go. I run the pasta through a 2-3 times on each width, and dust with a bit of flour on both sides if I’m getting any sticking. The pasta you see pictured here (above and below) was rolled out to 4 on my Atlas 150.
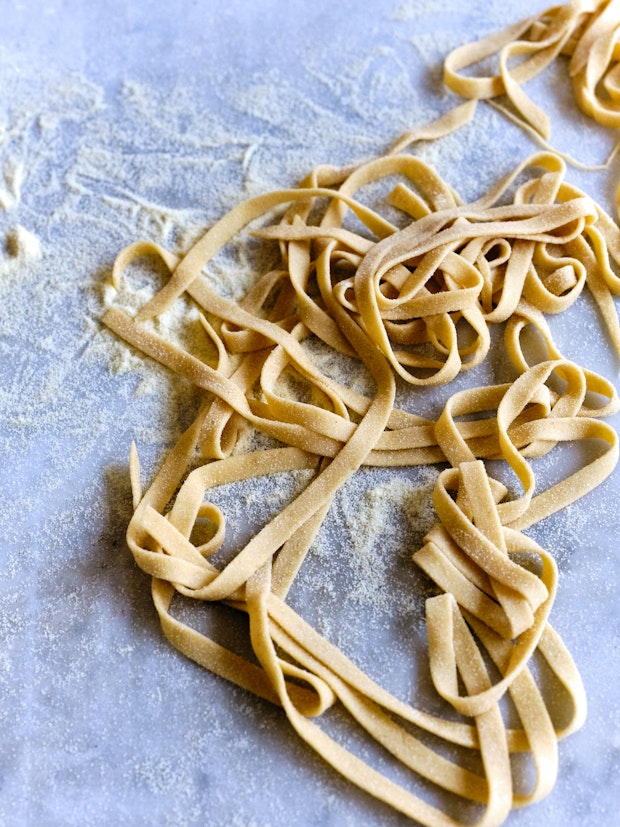
Once your pasta sheet is ready, attach whatever cutter attachment you like, feed the pasta through as you steadily crank. Avoid stopping once you start, and crank steadily. Transfer the cut pasta to a floured baking sheet, swirled into little nests. Repeat with the remaining dough.
How To Make Pasta In A Stand Mixer
First, make the dough. Add the flour, eggs, olive oil, salt and 2 tablespoons of water to the bowl of a stand mixer. Use the dough hook to knead on medium speed for 6-7 minutes. You’ll likely need to add more water, a small splash at a time, just until the dough comes together, you want to avoid an over-wet or sticky dough. See the pictures up above. Mix until the dough looks silky, elastic, and smooth.
Form the dough into a ball and place in a plastic bag. Alternately, you can wrap in plastic wrap. Allow to rest for 30 minutes at room temperature. Use Immediately, or refrigerate for up to a day. You might be able to get away with two days, but the dough will start to discolor.
When you’re ready to roll out the pasta, the method is basically an automated version of the hand-cranked traditional pasta maker. Connect the pasta roller attachment to your mixer, and set the adjustment width to its widest setting.
Feed the pasta through a few times at each width, decreasing the width until the pasta reaches your desired thickness. You’ll want to pat the pasta with a bit of flour now and then as you’re working through the thicknesses to avoid any stickiness. And if your pasta is getting too wide, simply fold it in half or thirds and start over at the widest setting again.
Once you have your pasta sheet, swap out the roller attachment for the cutter attachment and feed the dough through the cutter. Transfer the cut pasta to a floured baking sheet, swirled into little nests. Repeat with the remaining dough.
How to Cook Homemade Pasta
When you’re ready to cook the pasta do it in a large pot of well-salted water. Depending on the thickness and shape of your pasta, this might just take a minute or so. Pasta made with a high percentage of semolina flour or whole-grain flours will take a bit longer to cook than pasta made with “00” flour. Reserve a cup or two of the pasta water (in case you want to use it for a sauce), drain the pasta, and use immediately.
How To Take Care of Your Pasta Maker
With a bit of care, your pasta tools should last a lifetime, your pasta maker in particular! I use a pastry brush to dust any flour and dough off my pasta maker ofter each use. It allows me to get into all the creases, seams, and crevices. A slightly damp cloth can help any stubborn spots, but be sure to dry completely before storing. Same goes for any of my wood handled brass stamps and cutters.
How to Freeze Homemade Pasta
Freezing is my preferred method of storing any homemade pasta I’m not using immediately. Arrange freshly made, uncooked pasta across a floured baking sheet. If you’re working with shapes like trofie, garganelli, raviolis, cavatelli, etc. – make sure they’re in a single layer. For longer noodles, fettuccine, pici, spaghetti, etc. – arrange them into nests. Freeze for a couple of hours, and then transfer to double layer plastic bags. You can freeze for up to a couple of months. And you can cook straight from the freezer. No need to thaw, just dump the pasta into boiling salted water, and increase the cooking time a bit.
Cookbooks with Great Information on Making Pasta
I thought I’d list off a few books in my collection that have good chapters or sections about making homemade pasta or inspiration for what you might make with it. I’m sure Im missing a lot (apologies in advance), so if you have a favorite please list in the comments!
- Flour + Water: Pasta by Thomas McNaughton and Paolo Lucchesi
- Cooking by Hand by Paul Bertolli
- Made in Italy: Food & Stories by Giorgio Locatelli – robust pasta chapter.
- Chez Panisse Pasta, Pizza, & Calzone by Alice Waters
- My Calabria: Rustic Family Cooking from Italy’s Undiscovered South by Rosetta Costantino with Janet Fletcher. Talks through her eggless dough + preparations.
- The Classic Italian Cook Book by Marcella Hazan
- Pasta Grannies: The Secrets of Italy’s Best Home Cooks
- Anna Del Conte on Pasta
- Osteria: 1000 Generous Recipes from Italy’s Best Restaurants – there’s a good section on Egg Pasta & Other Handmade Pasta with some wonderful preparations I wasn’t aware of.
Recipes to Make with Fresh Pasta
A few favorite recipes that really sing when you use fresh pasta.
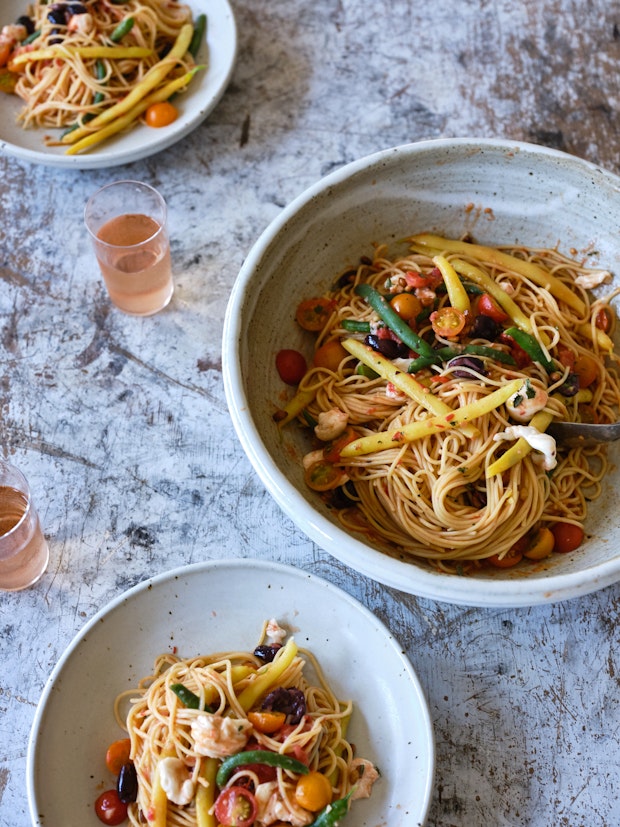
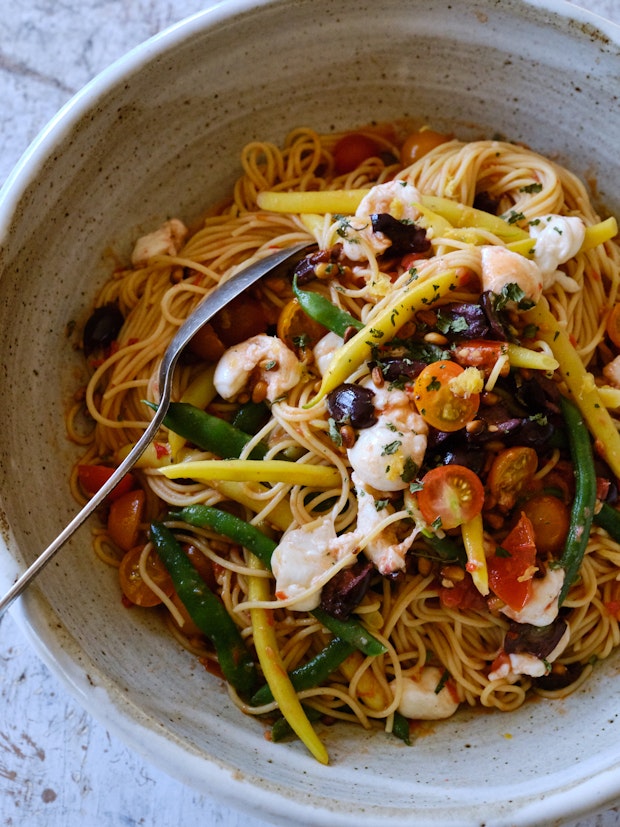
- Spaghetti with No-Cook Sauce
- I love them in my favorite vegan ramen (I make them chubby, hand-cut with 100% apf here)
- Or keep it no-fuss and simply toss homemade pasta with this pesto, this bright and simple tomato sauce, or this creamy crushed walnut magic.
Variations on the Basic Pasta Recipe
Simple Beet Fettuccine: An easy way to make flavor variations is to swap out the water in your pasta recipe with vegetable juice. I love this beet juice-spiked fettuccine, the beets lend a beautiful pink color, and you can play around with how pale or saturated your noodles are by adding more or less beet juice.
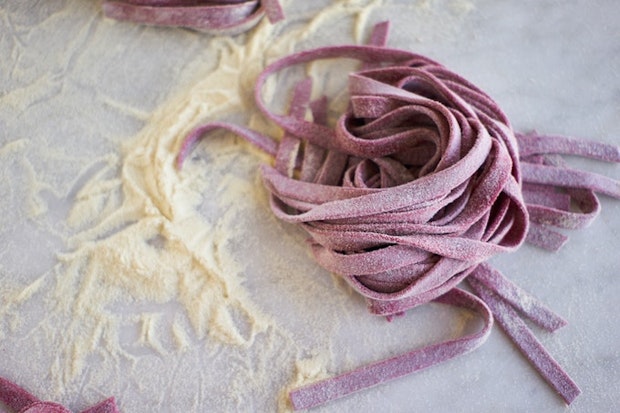
You can, of course, substitute other liquids, or use yellow (or orange) beets. If you have success with these noodles, use the recipe as a jumping off point for other flavors. The ratio of eggs to flour in this recipe is slightly different – you can use that, or the one I’m highlighting here. The ideas is the same, swap in strong juice for water in the recipe.
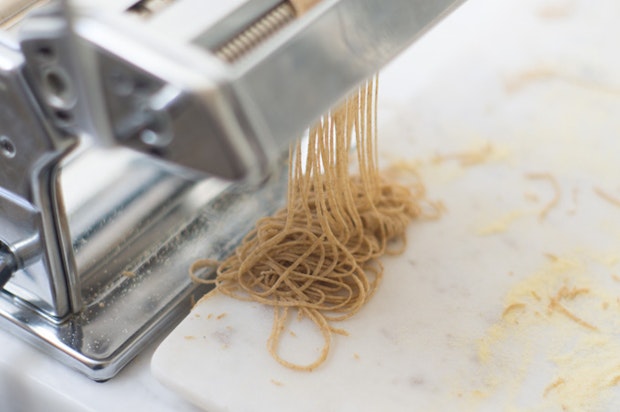
Rye Pasta: And here’s and example of a rye pasta I did a few years back. It’s a nice option for the colder months, it freezes well (so I can make a lot in one go), and you can drop tangles of the noodles into a range of restorative broths.
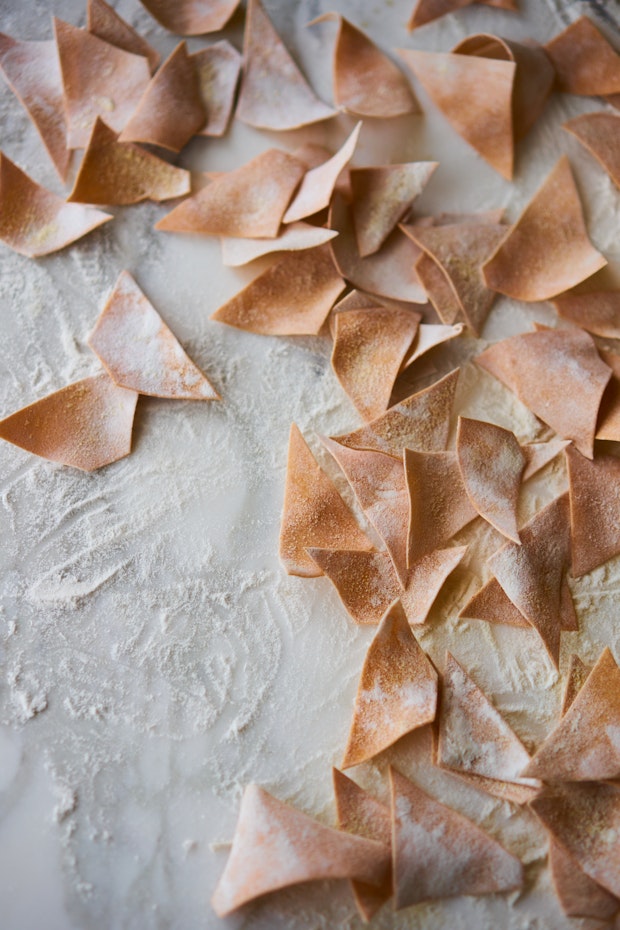
Shape: Play around with different shapes! You could make pasta ever day for a year, and never have to repeat.
I hope this post has been helpful! Making fresh pasta at home is a simple pleasure that everyone can enjoy whether you’re 8 or 88! xx, -h
Continue reading Homemade Pasta on 101 Cookbooks