Labels

Saturday, August 29, 2020

Simple Bruschetta


This is the very best time of year to make bruschetta. It’s late summer and tomatoes are vivid and ripe, saturated with flavor. Good tomatoes are the thing that matters most when it comes to making this classic, open-faced Italian antipasto. This is such a simple preparation it means paying attention to the little details matters. Today I’m going to talk through how I make my favorite bruschetta, and include a few simple variations as well.
Simple Bruschetta

The Importance of Using Good Ingredients

The first rule of making great bruschetta is to use the best ingredients you can get. You’re using such a short list of ingredients, it’s important they’re all super flavorful. Use fragrant, golden extra-virgin olive oil, vinegar that tastes good, and in-season, ripe tomatoes. We’ll talk about choosing bread next, but using good bread and tomatoes and olive oil is everything here and dictates whether your results will be “pretty good”, or “omg so good.”

What Kind of Bread Should you Use for Bruschetta?

In short, you want a hearty bread that can stand up to grilling. Marcella Hazan says, “the name bruschetta comes from bruscare, which means “to roast over coals” the original and still the best way of toasting the bread.” She calls for Italian whole wheat bread (pane integrale) sliced 1 1/2 inches thick. I usually use whatever hearty sourdough or country loaf I have on hand at the time. If you’re baking homemade sourdough, by all means use that. Bruschetta is a great way to use up day(s)-old bread. Many sources will tell you 1/2-inch slices are the goal, and Marcella weighs in suggesting we use bread sliced 1 1/2-inches thick. I find that slices 1/2-inch to 3/4-inch thick hit the sweet spot where you can get a good ratio of topping to bread in each bite. 

That said, let me back up a minute and note that a lot of the bruschetta I see photos of are actually crostini – small two-bite toasts sliced from a white baguette-style bread and topped with a tomato mixture. That’s not what I’m talking about today. The bruschetta I love uses hearty slabs of bread, preferably with a dense crumb. It is grilled, rubbed well with garlic (both sides!), and topped. These aren’t two-bite affairs, they’re more like 5-6.

As far as grilling the bread? In the A16: Food+Wine cookbook they note, “the word bruschetta, which is derived from bruciare, “to burn” implies that some charring on the bread is desirable.” Assuming both sources are right about the origins of the name bruschetta, we want to grill our bread, and get a kiss of the burn you get from grilling. If you don’t have access to a grill, second choice would be to use a broiler. Third option, use  a stovetop grill pan.
Grilled Sourdough Bread for Making Bruschetta

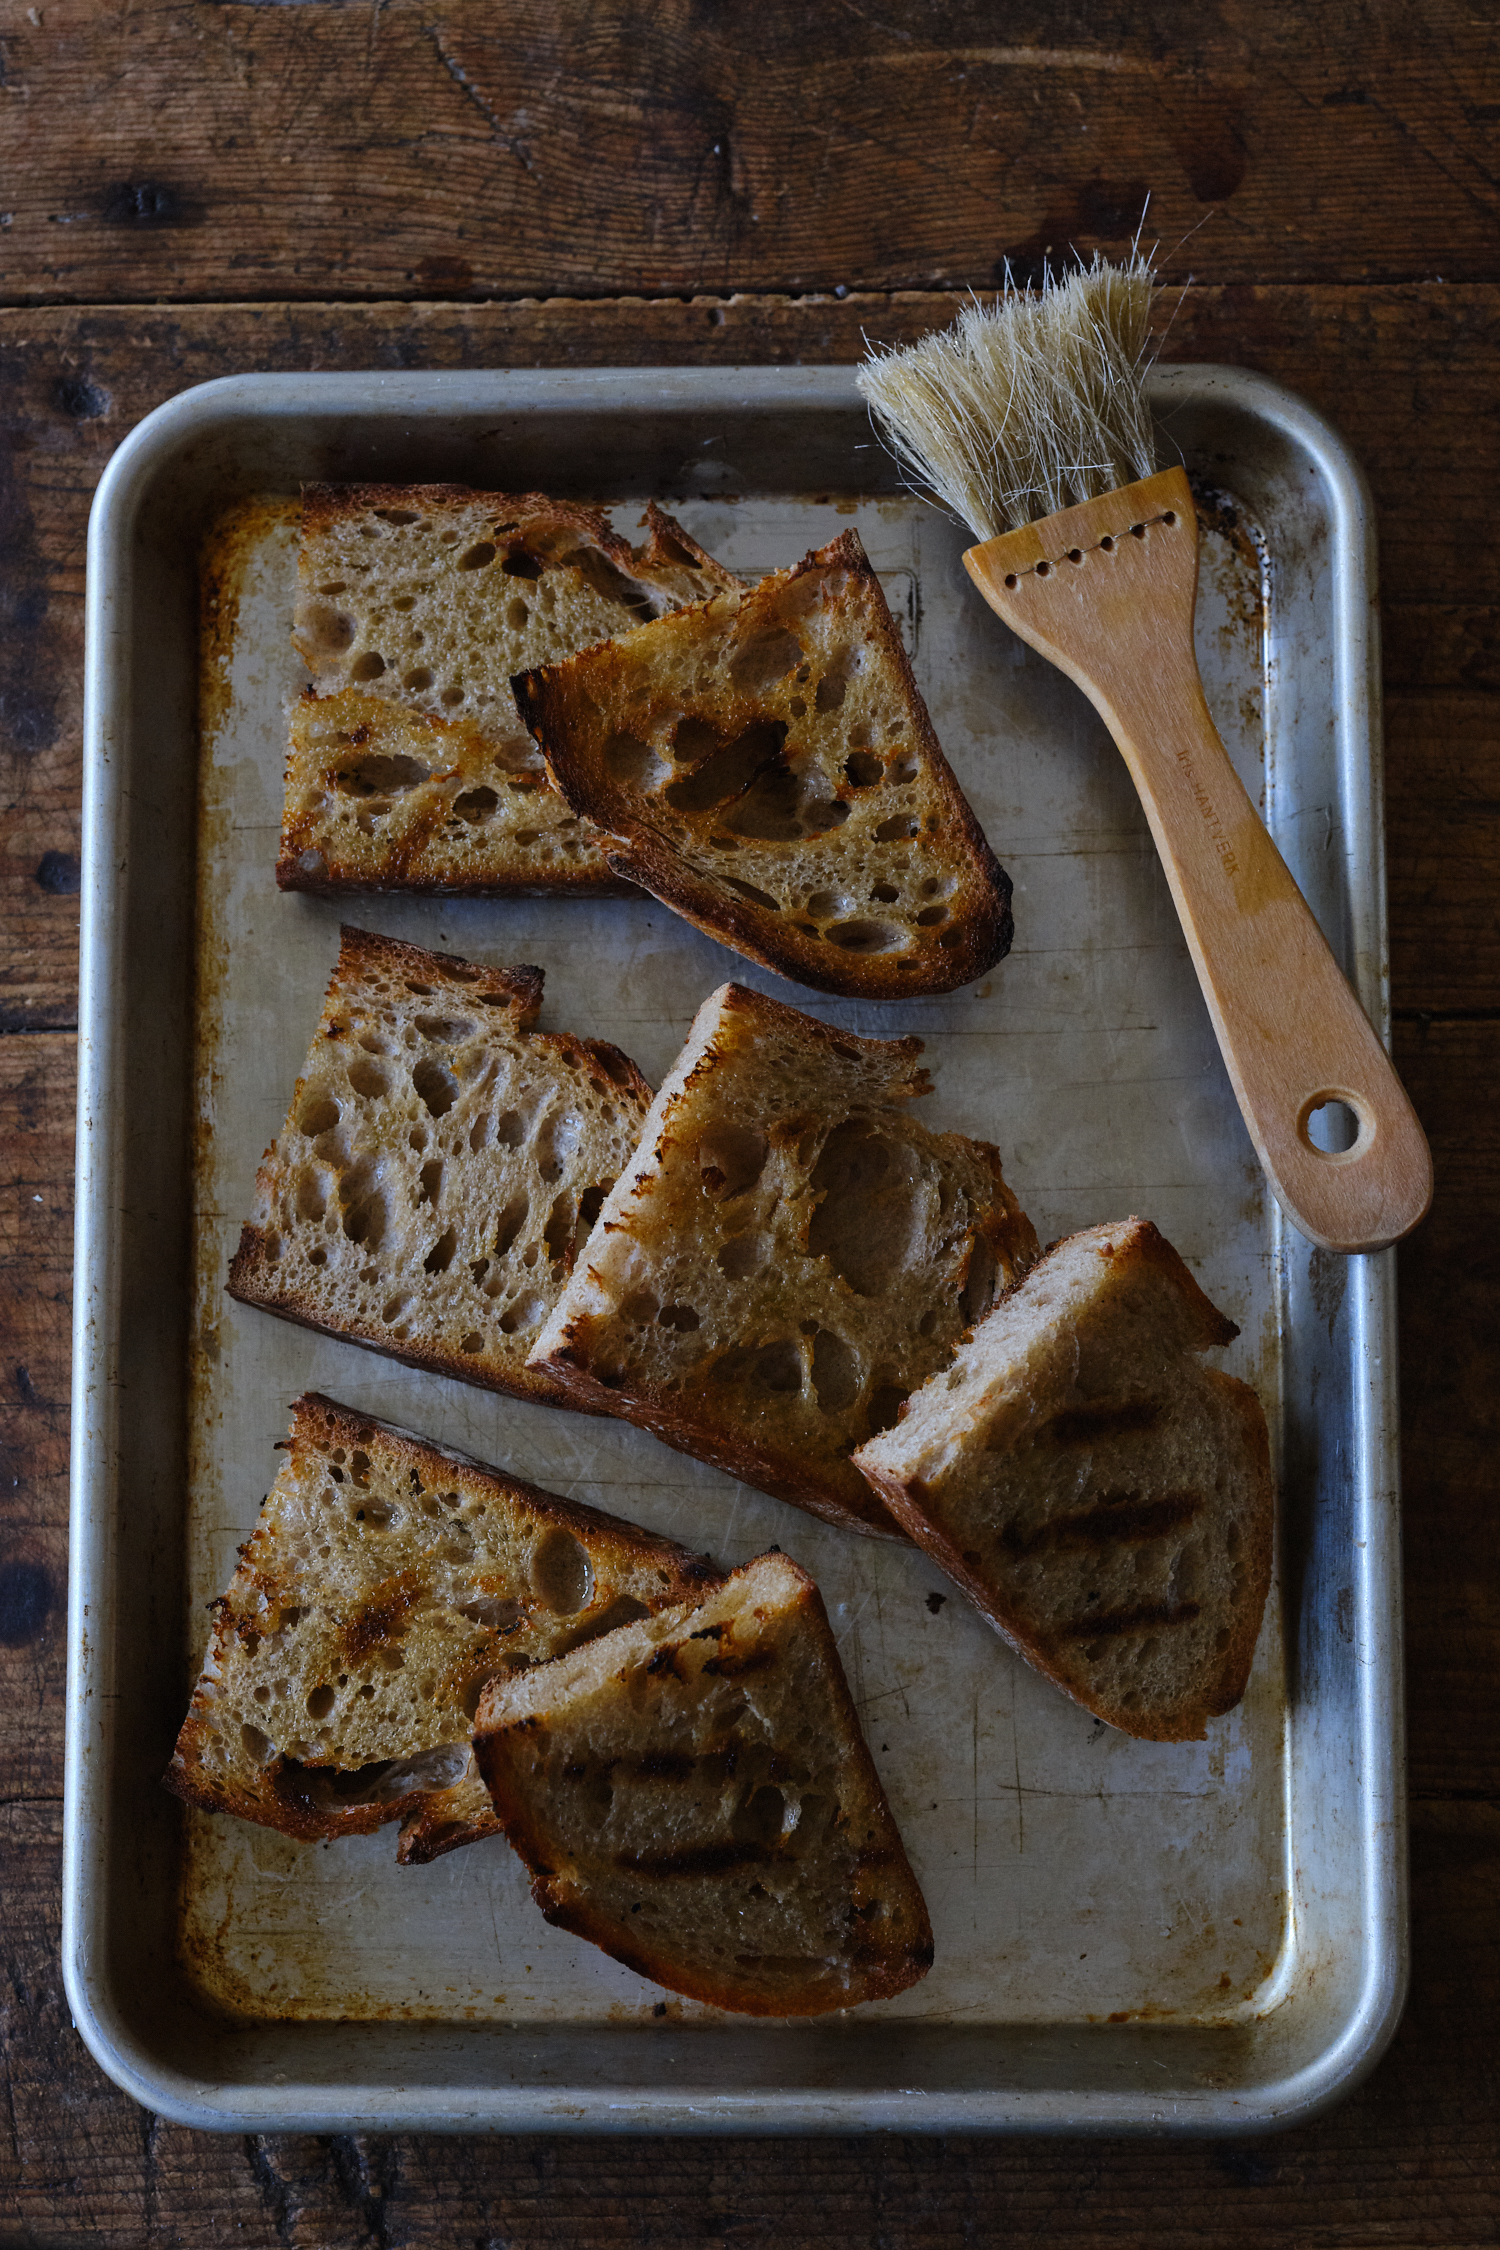
A Tip for Grilling Bread

Brush each slice with a bit of extra-virgin olive oil before grilling. I find this helps keep the bread from drying out as it is toasting. As soon as you’ve removed the bread from the grill, and it is cool enough to handle, rub both sides vigorously with a peeled clove of garlic. Especially if you love garlic as much as I do.

Today’s Bruschetta Recipe

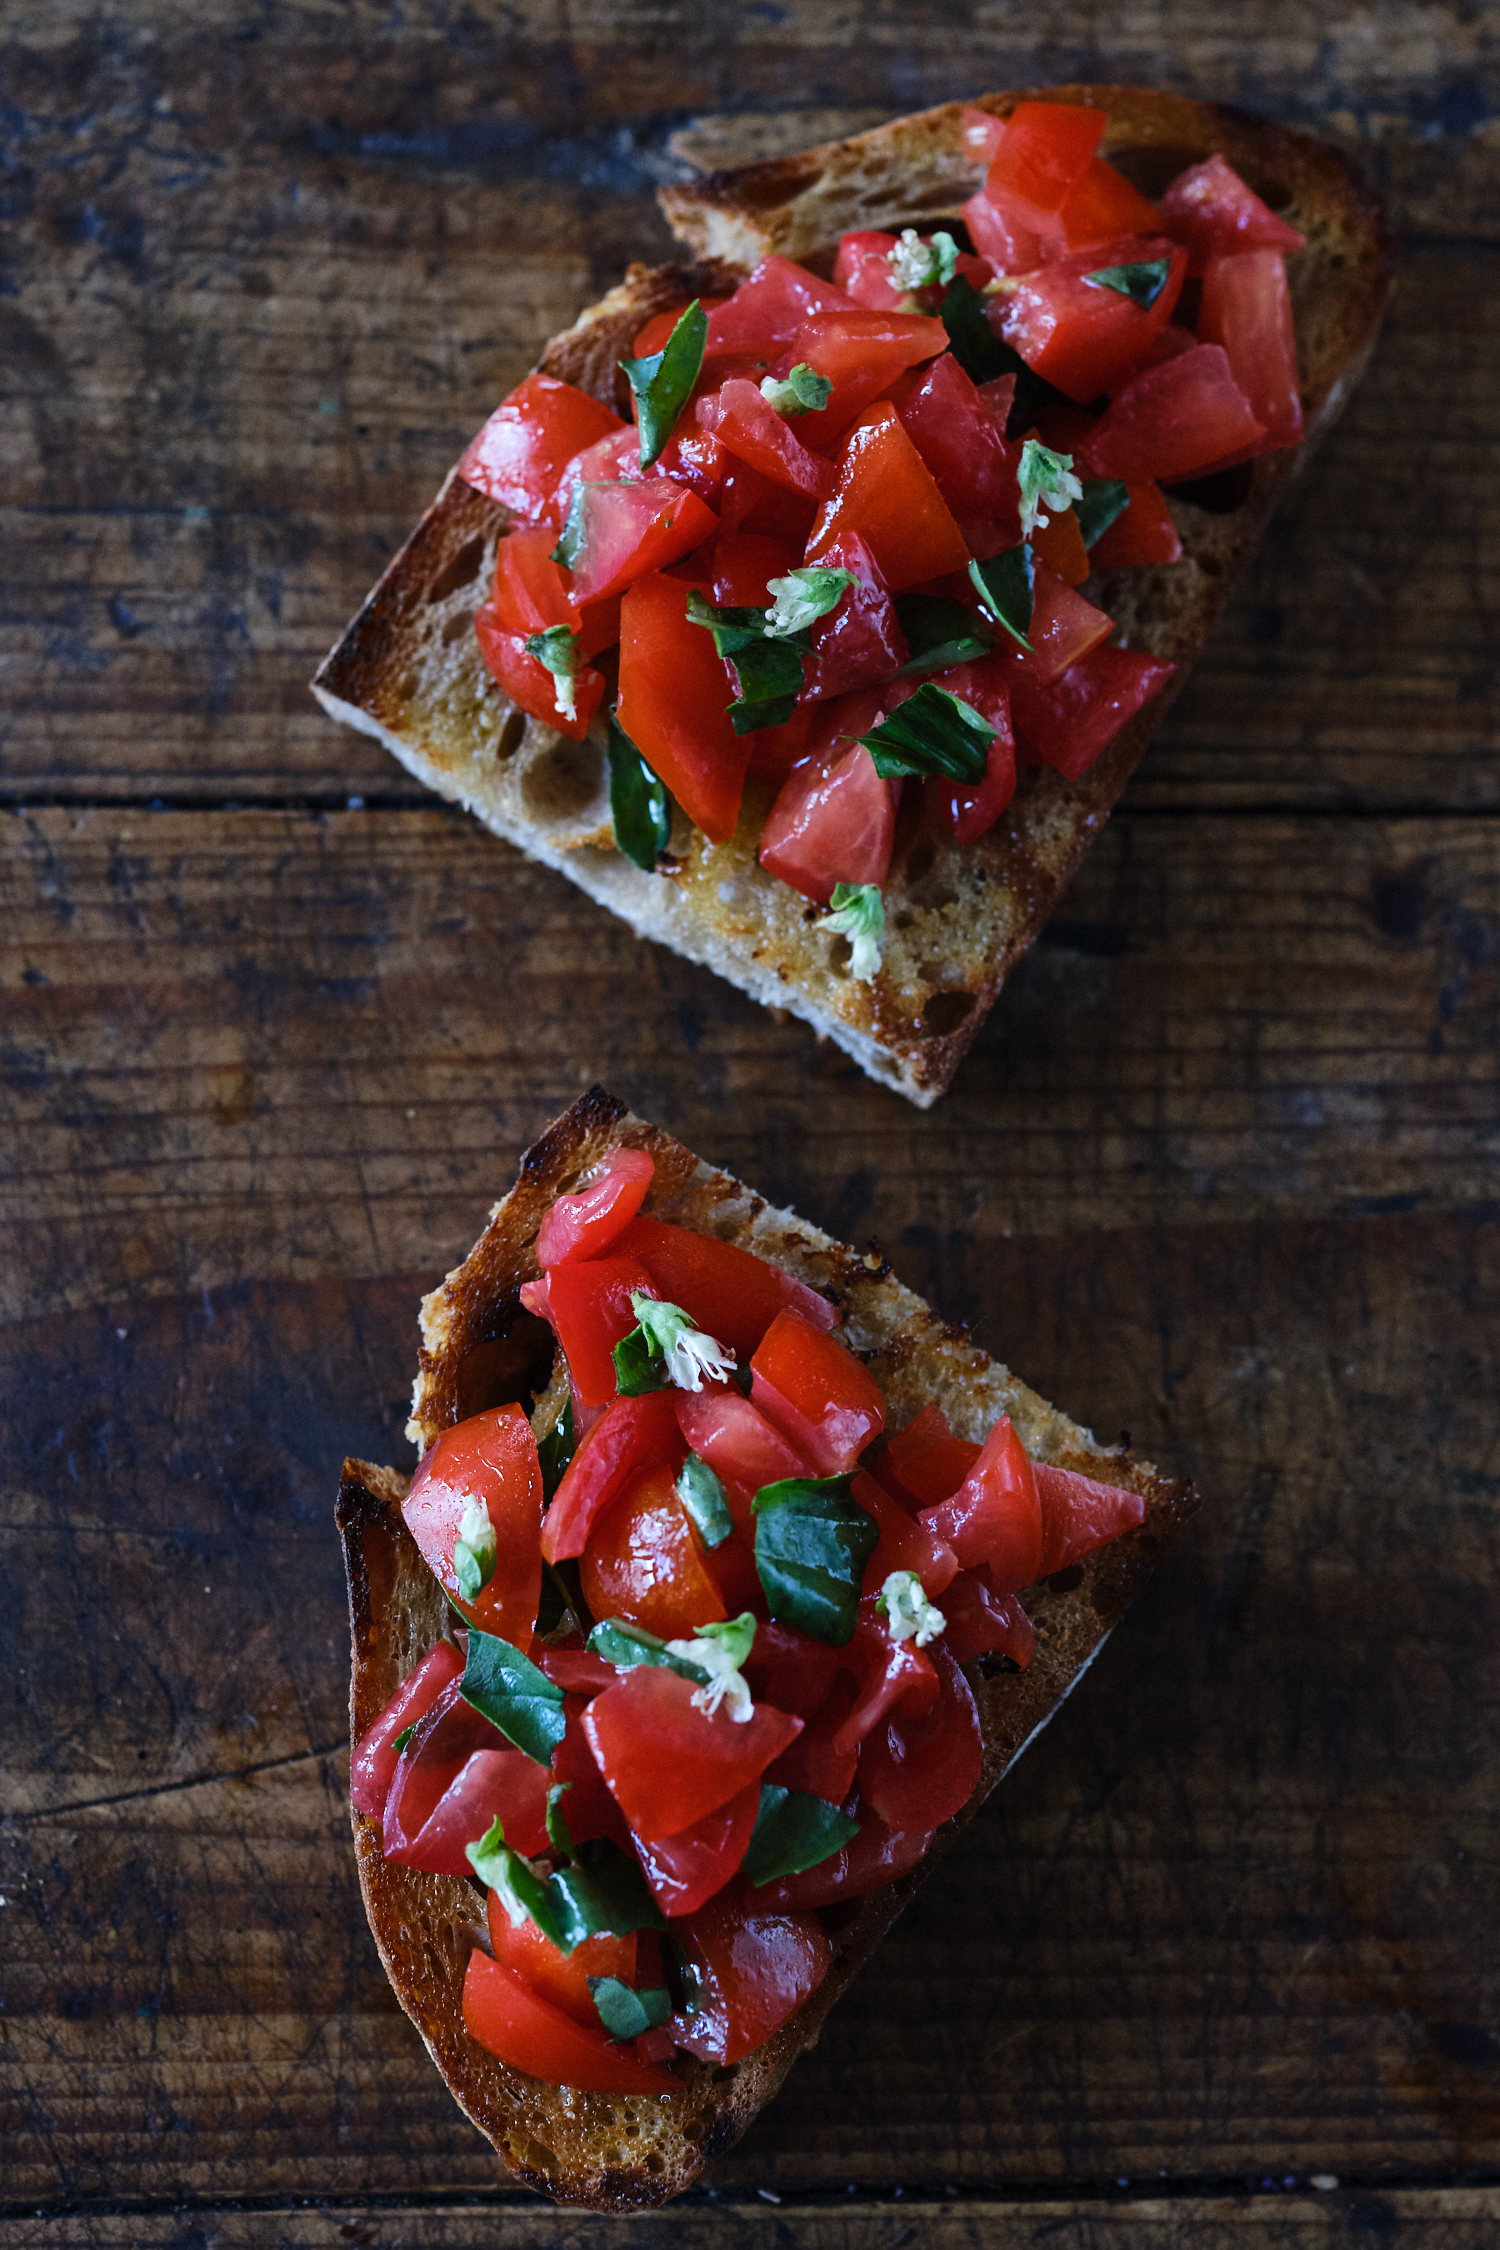
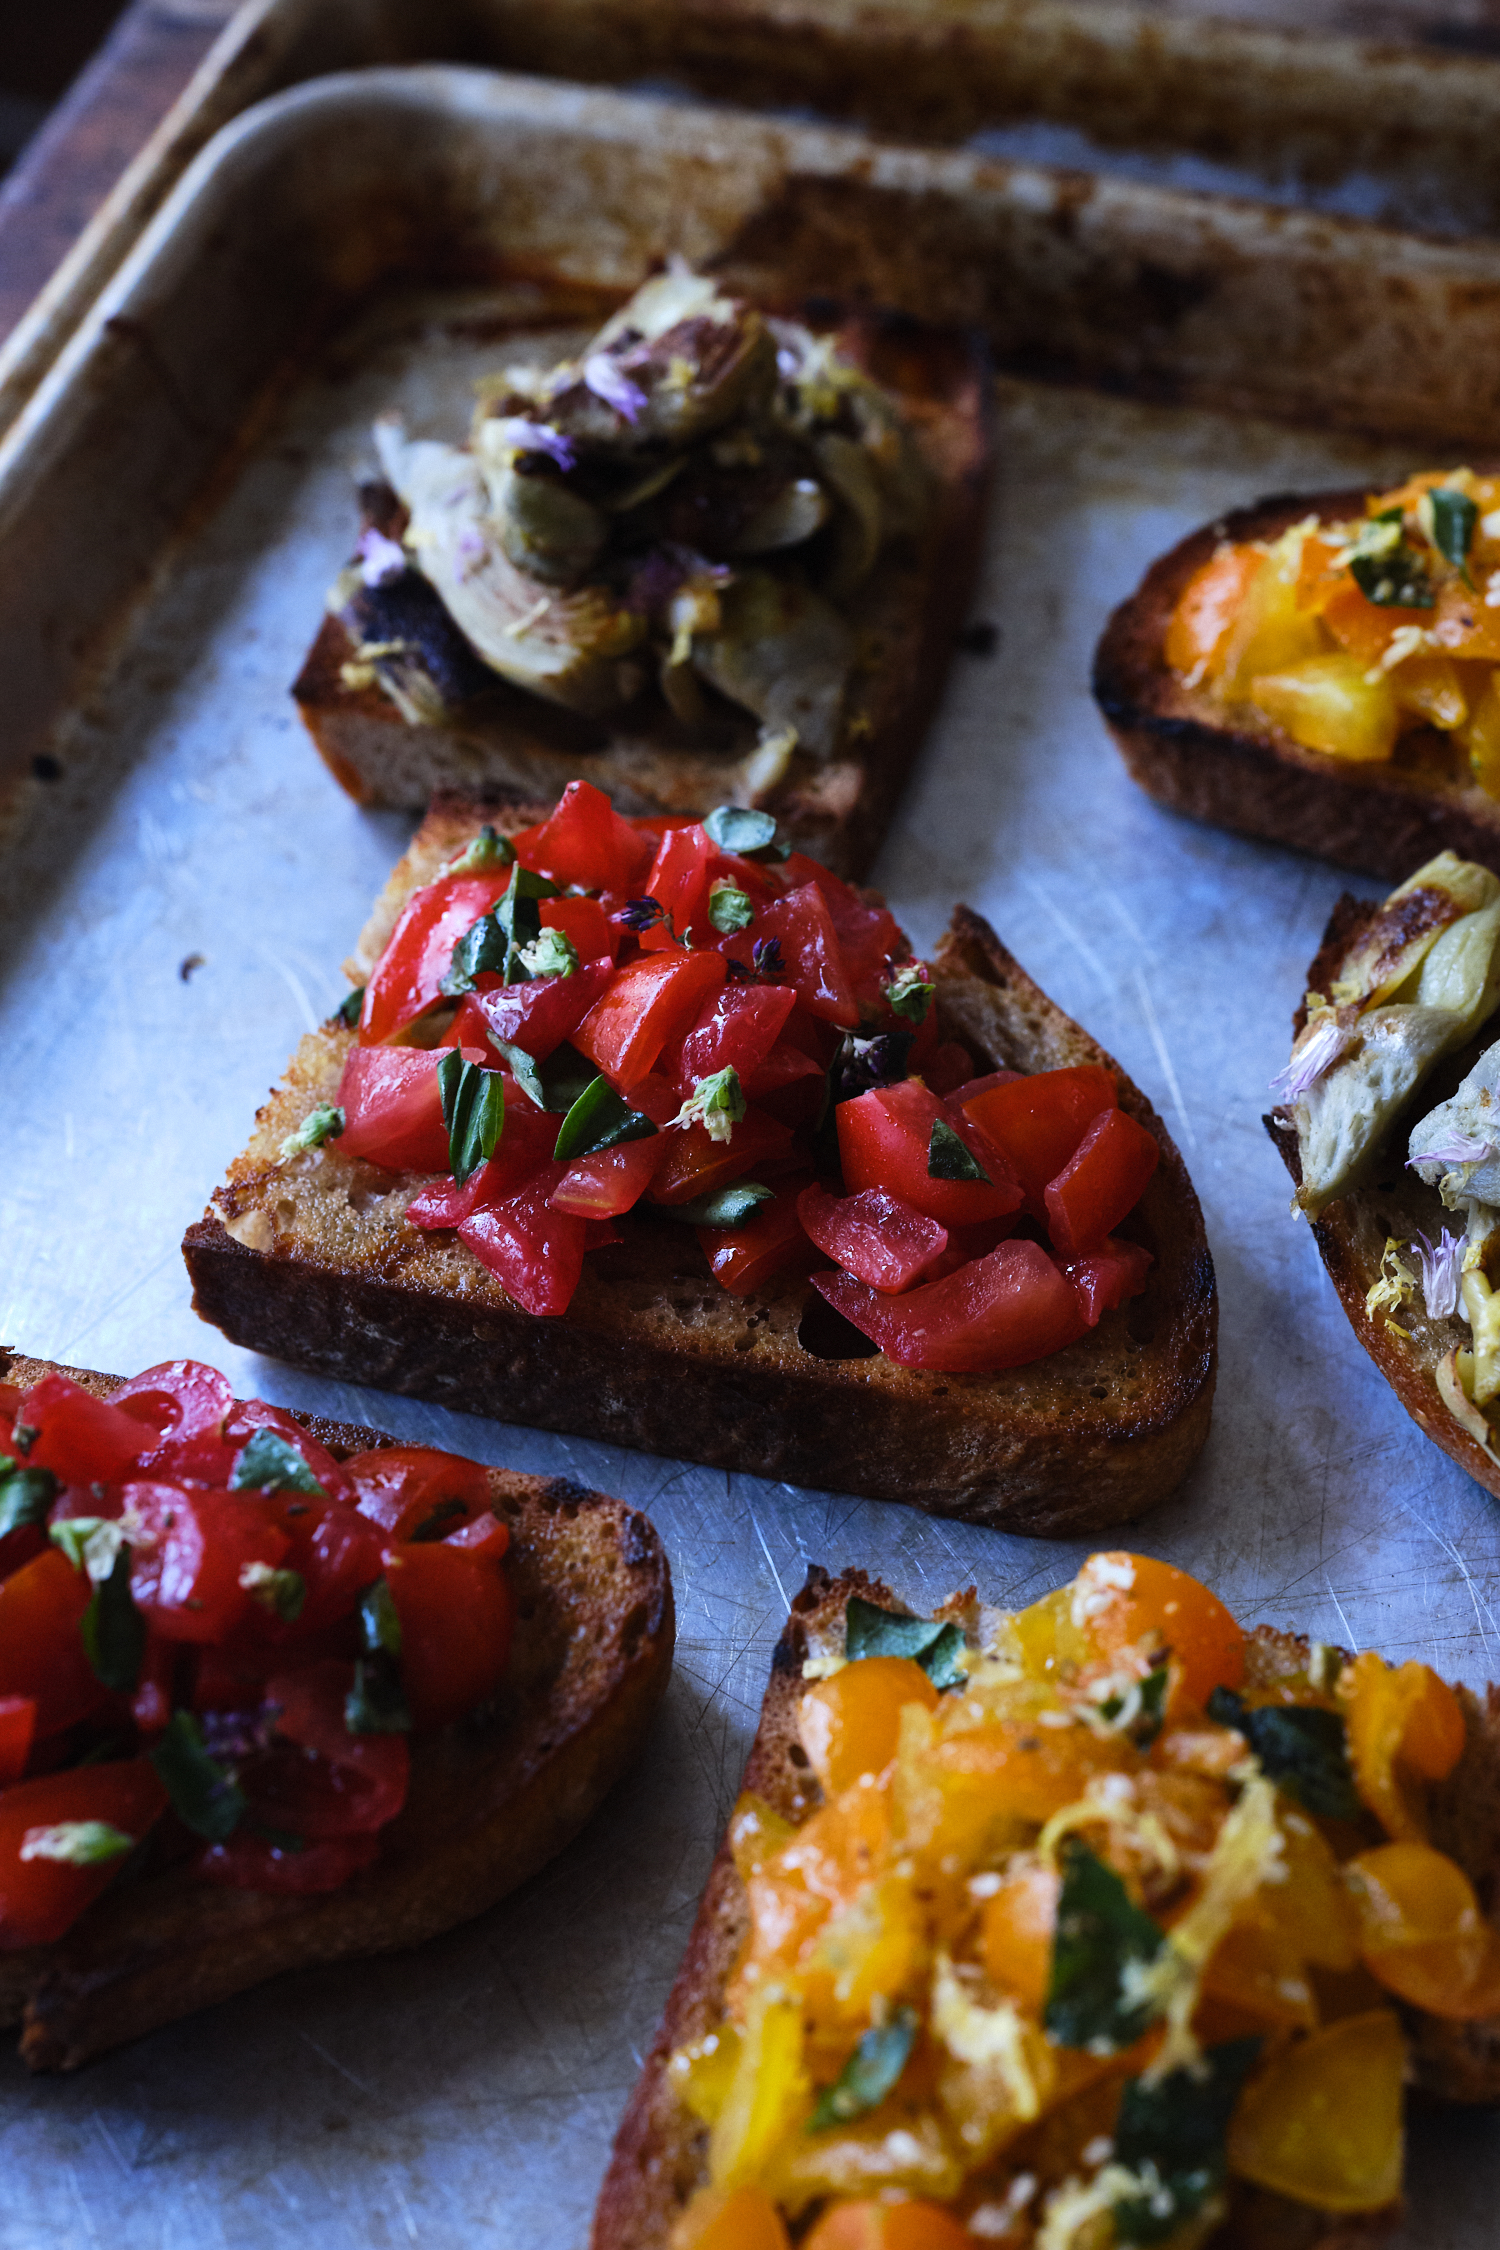
It’s my favorite, simple, use-your-best-tomatoes version. Red tomatoes are tossed with olive oil, salt, torn basil, and a splash of vinegar. I’ll include the recipe for this down below, but you can use the same approach for the other variations I list here.
Simple Bruschetta with Ripe Red Tomatoes and Basil

Let’s Talk about the Vinegar Component

I think of the vinegar in bruschetta as a seasoning component of sorts. It brings acidity, melds with the olive oil, and brings some balance. I’ll say it outright. You can’t use awful vinegar and there’s a lot of it out there. I made so much bruschetta in my twenties using harsh vinegars, and I’m just sad it took me a while to find the magic of good ones. Two favorite vinegars top of mind right now include Katz vinegars, and Brightland’s Parasol.

If you taste your vinegar and wince hard, or if it has a musty smell, consider investing in a new bottle. In Italy you encounter bruschetta using a range of vinegars. I tend to use a favorite white wine vinegar (for this and many salads), but if you have a red wine vinegar, herb vinegar or balsamic vinegar you love, use that. I’d even argue, a squeeze of lemon juice is a better choice than a bad tasting vinegar. If you use lemon juice, add some zest while you’re at it. It might not be traditional, but it will be delicious! 
Bruschetta Made with Seasonal Tomatoes and Basil

A Few Bruschetta Variations

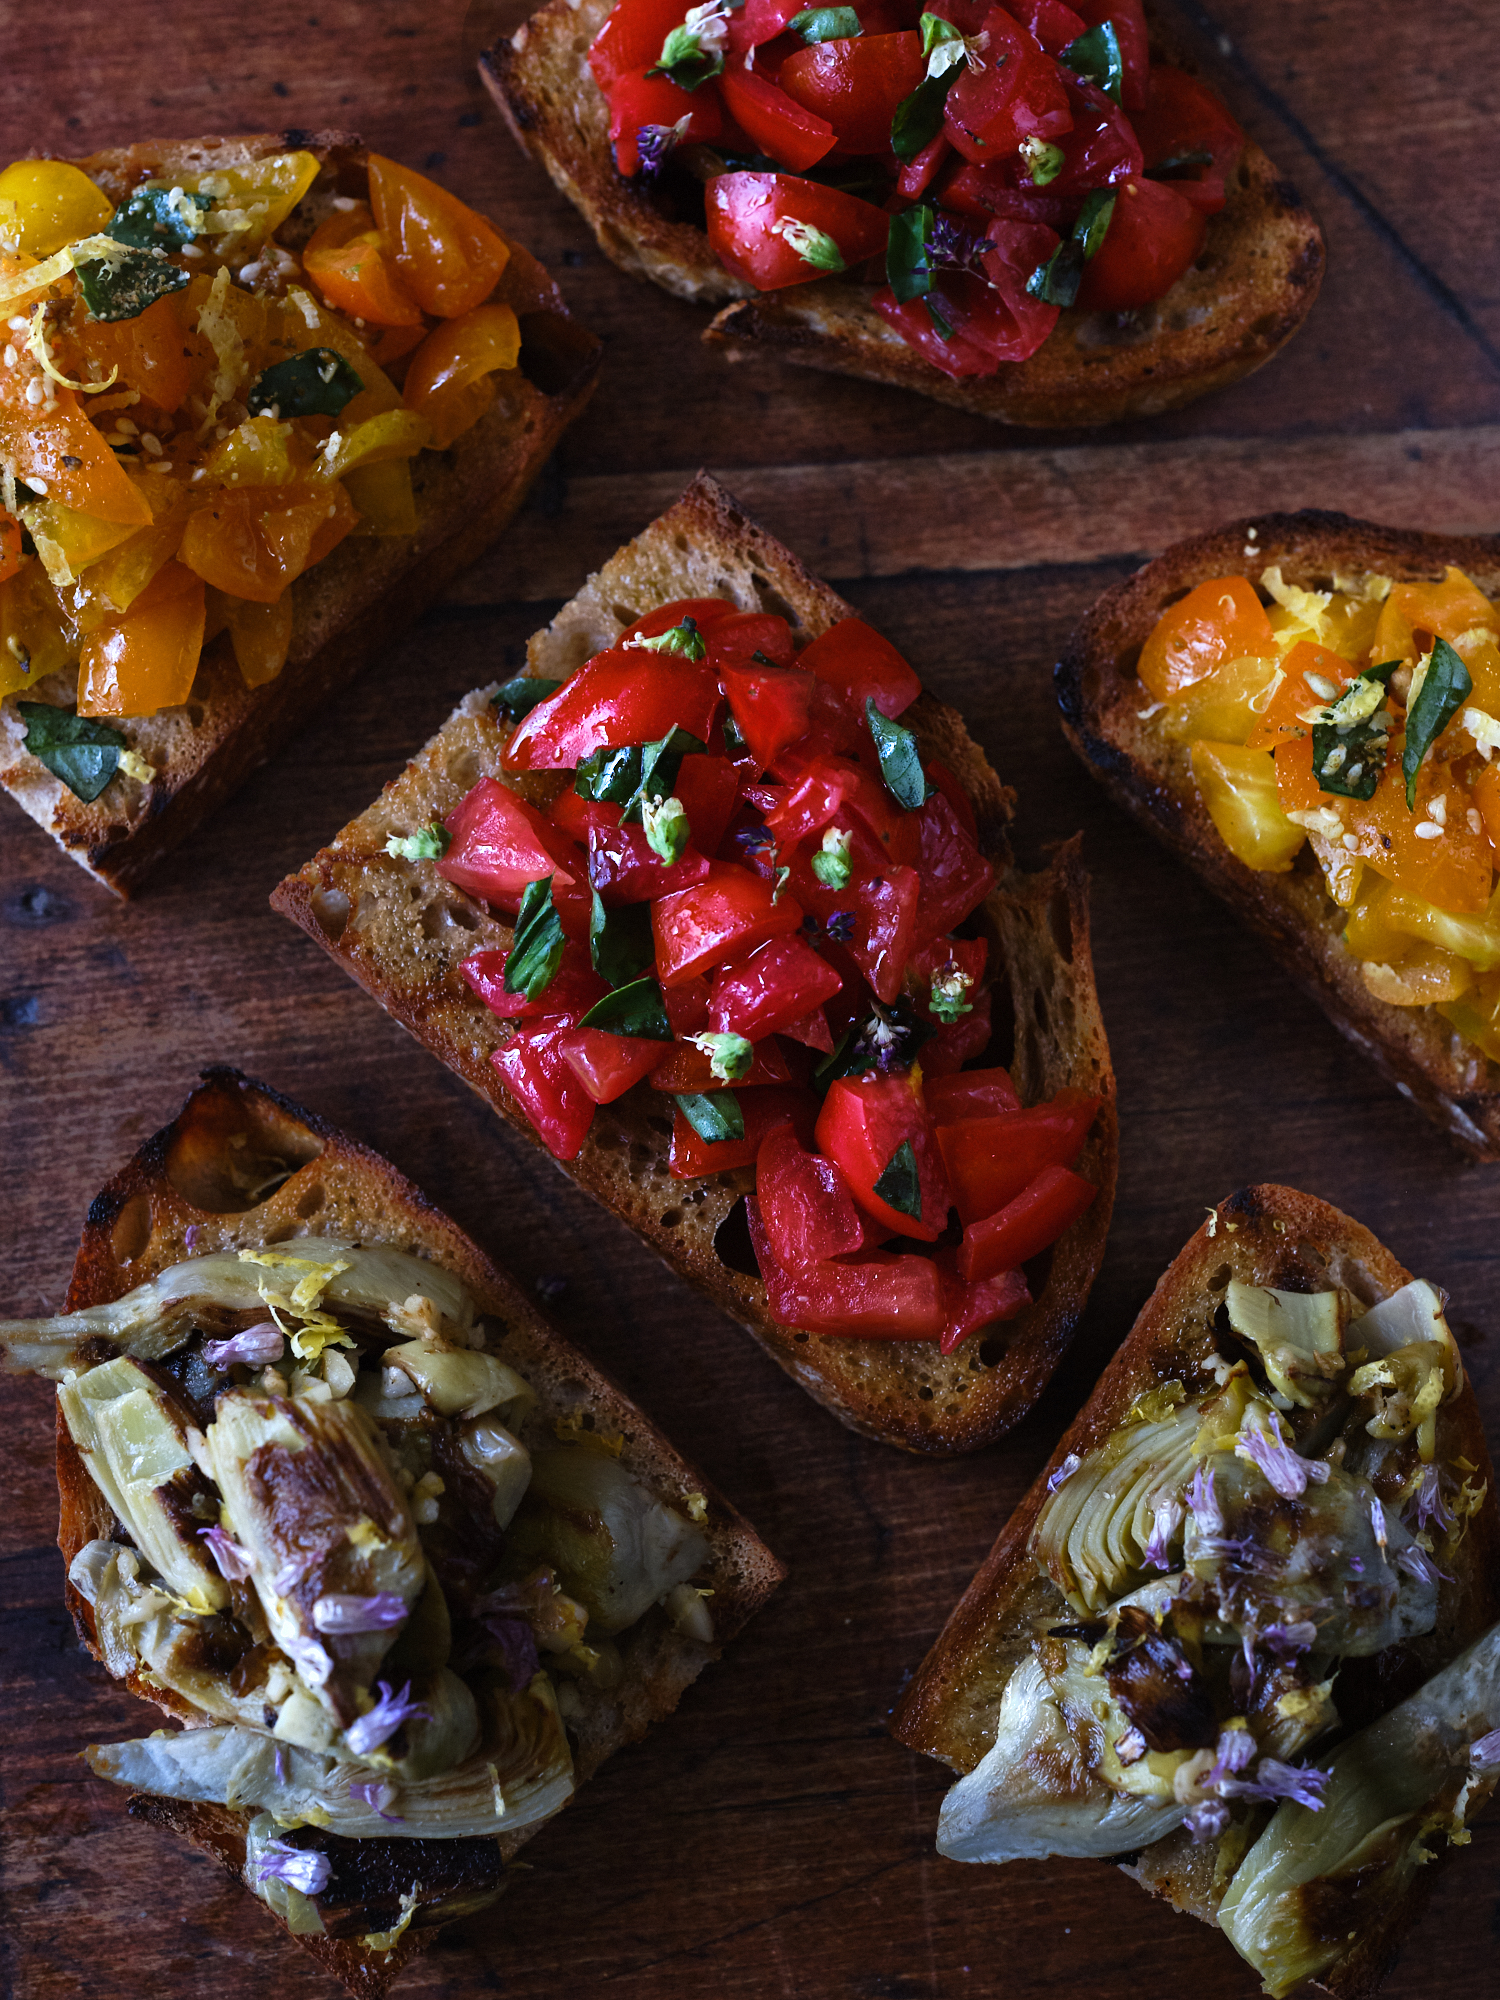
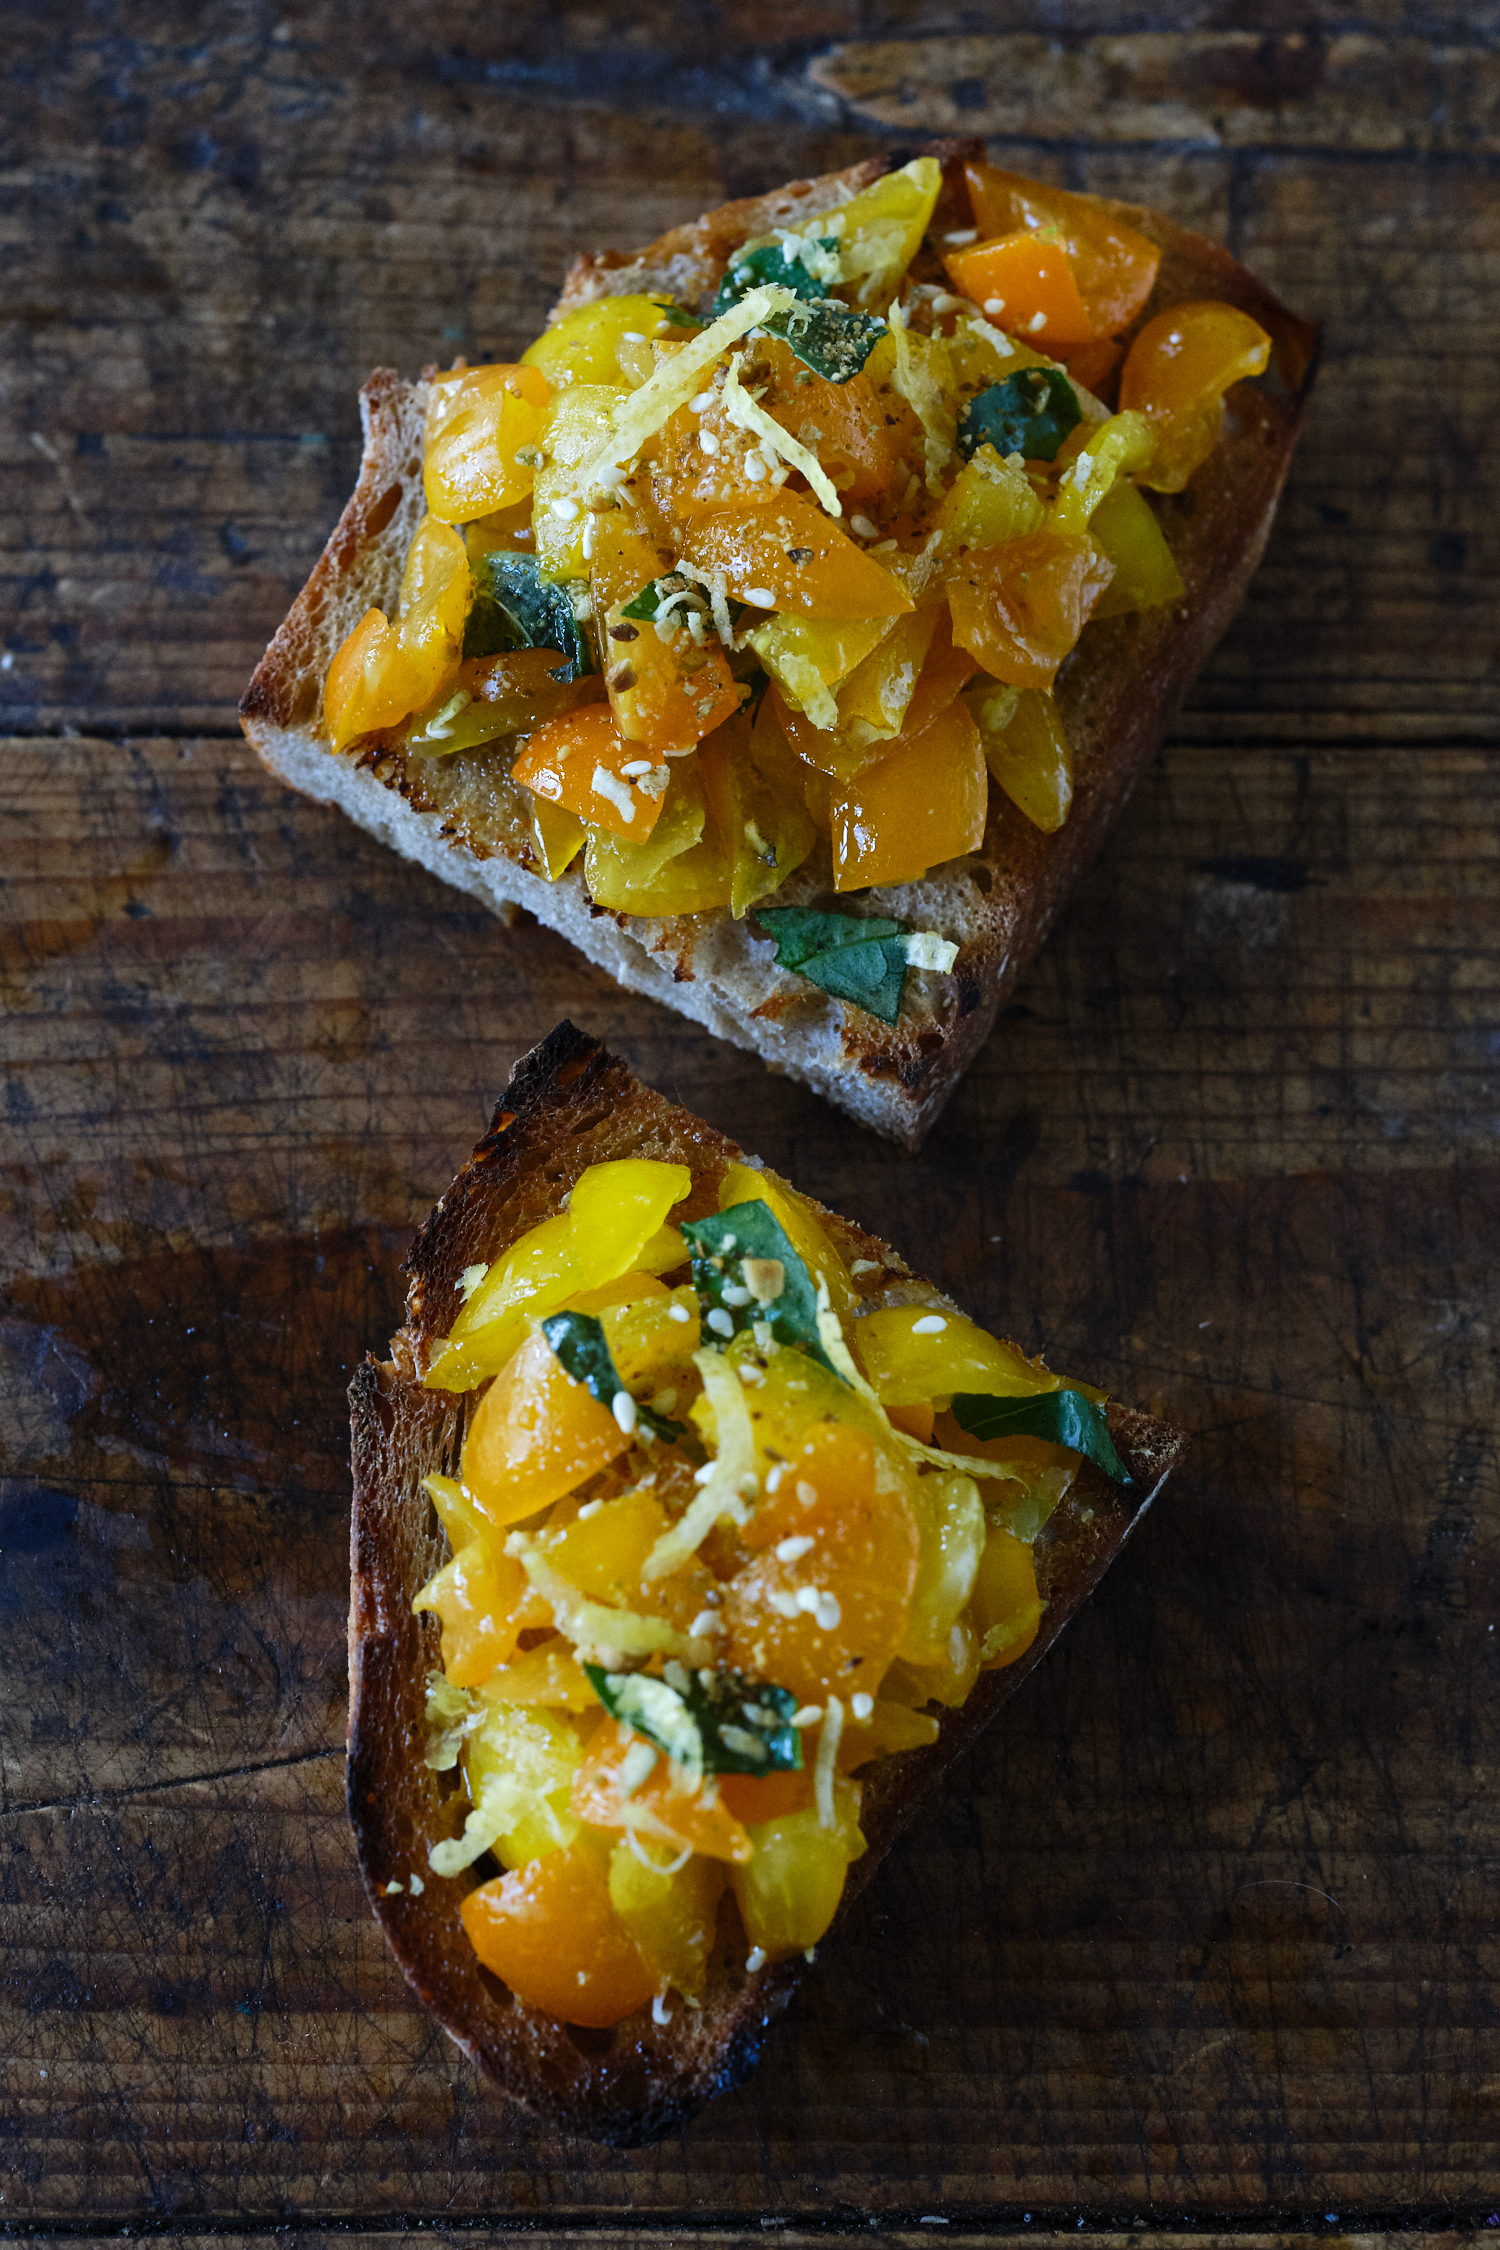
  • Yellow Tomato Bruschetta with Dukkah & Lemon Zest: A version of bruschetta with yellow teardrop tomatoes tossed with good olive oil, torn basil, a splash of good-tasting white wine vinegar. Pictured below. Finished with lots of lemon zest and a generous sprinkling of dukkah. You can make your dukkah. Or, I also love this Botanica version. If you keep a lemon olive oil on hand, use that for an extra-special version.
    Bruschetta with Yellow Tomatoes
  • Pan-blistered Artichoke Bruschetta: Top grilled bread with golden-crusted baby artichokes, drizzle with extra-virgin olive oil or lemon olive oil, black pepper, and sprinkle with chives and/or chive flowers. Pictured in the center of the photo below.
    Bruschetta - Three Different Ways
  • More ideas: I love a spicy red tomato version drizzled with lots of spicy garlic-chili oil
  • Or a yellow tomato version tossed with a garlic-turmeric oil, and finished with lots of black pepper. This take is zero-percent traditional but everyone loves it.
    An Assortment of Simple Bruschetta

    Cold-weather Bruschetta

    Although I’m writing this in summer – prime tomato and grilling season – you can experiment with bruschetta all year long. Roasted slabs of winter squash or sweet potatoes topped with a salsa verde are great. Or sautéed garlicky winter greens or kale and a bit of grated cheese. Think of all the toppings you can do with roasted mushrooms, roasted beets, and the like. Combine any of these with the last of whatever beans you may have cooked earlier in the week.  I’ll also note, this is the time of year I shift any bruschetta-making to the broiler from the grill.
    Preparing Bruschetta in the Kitchen
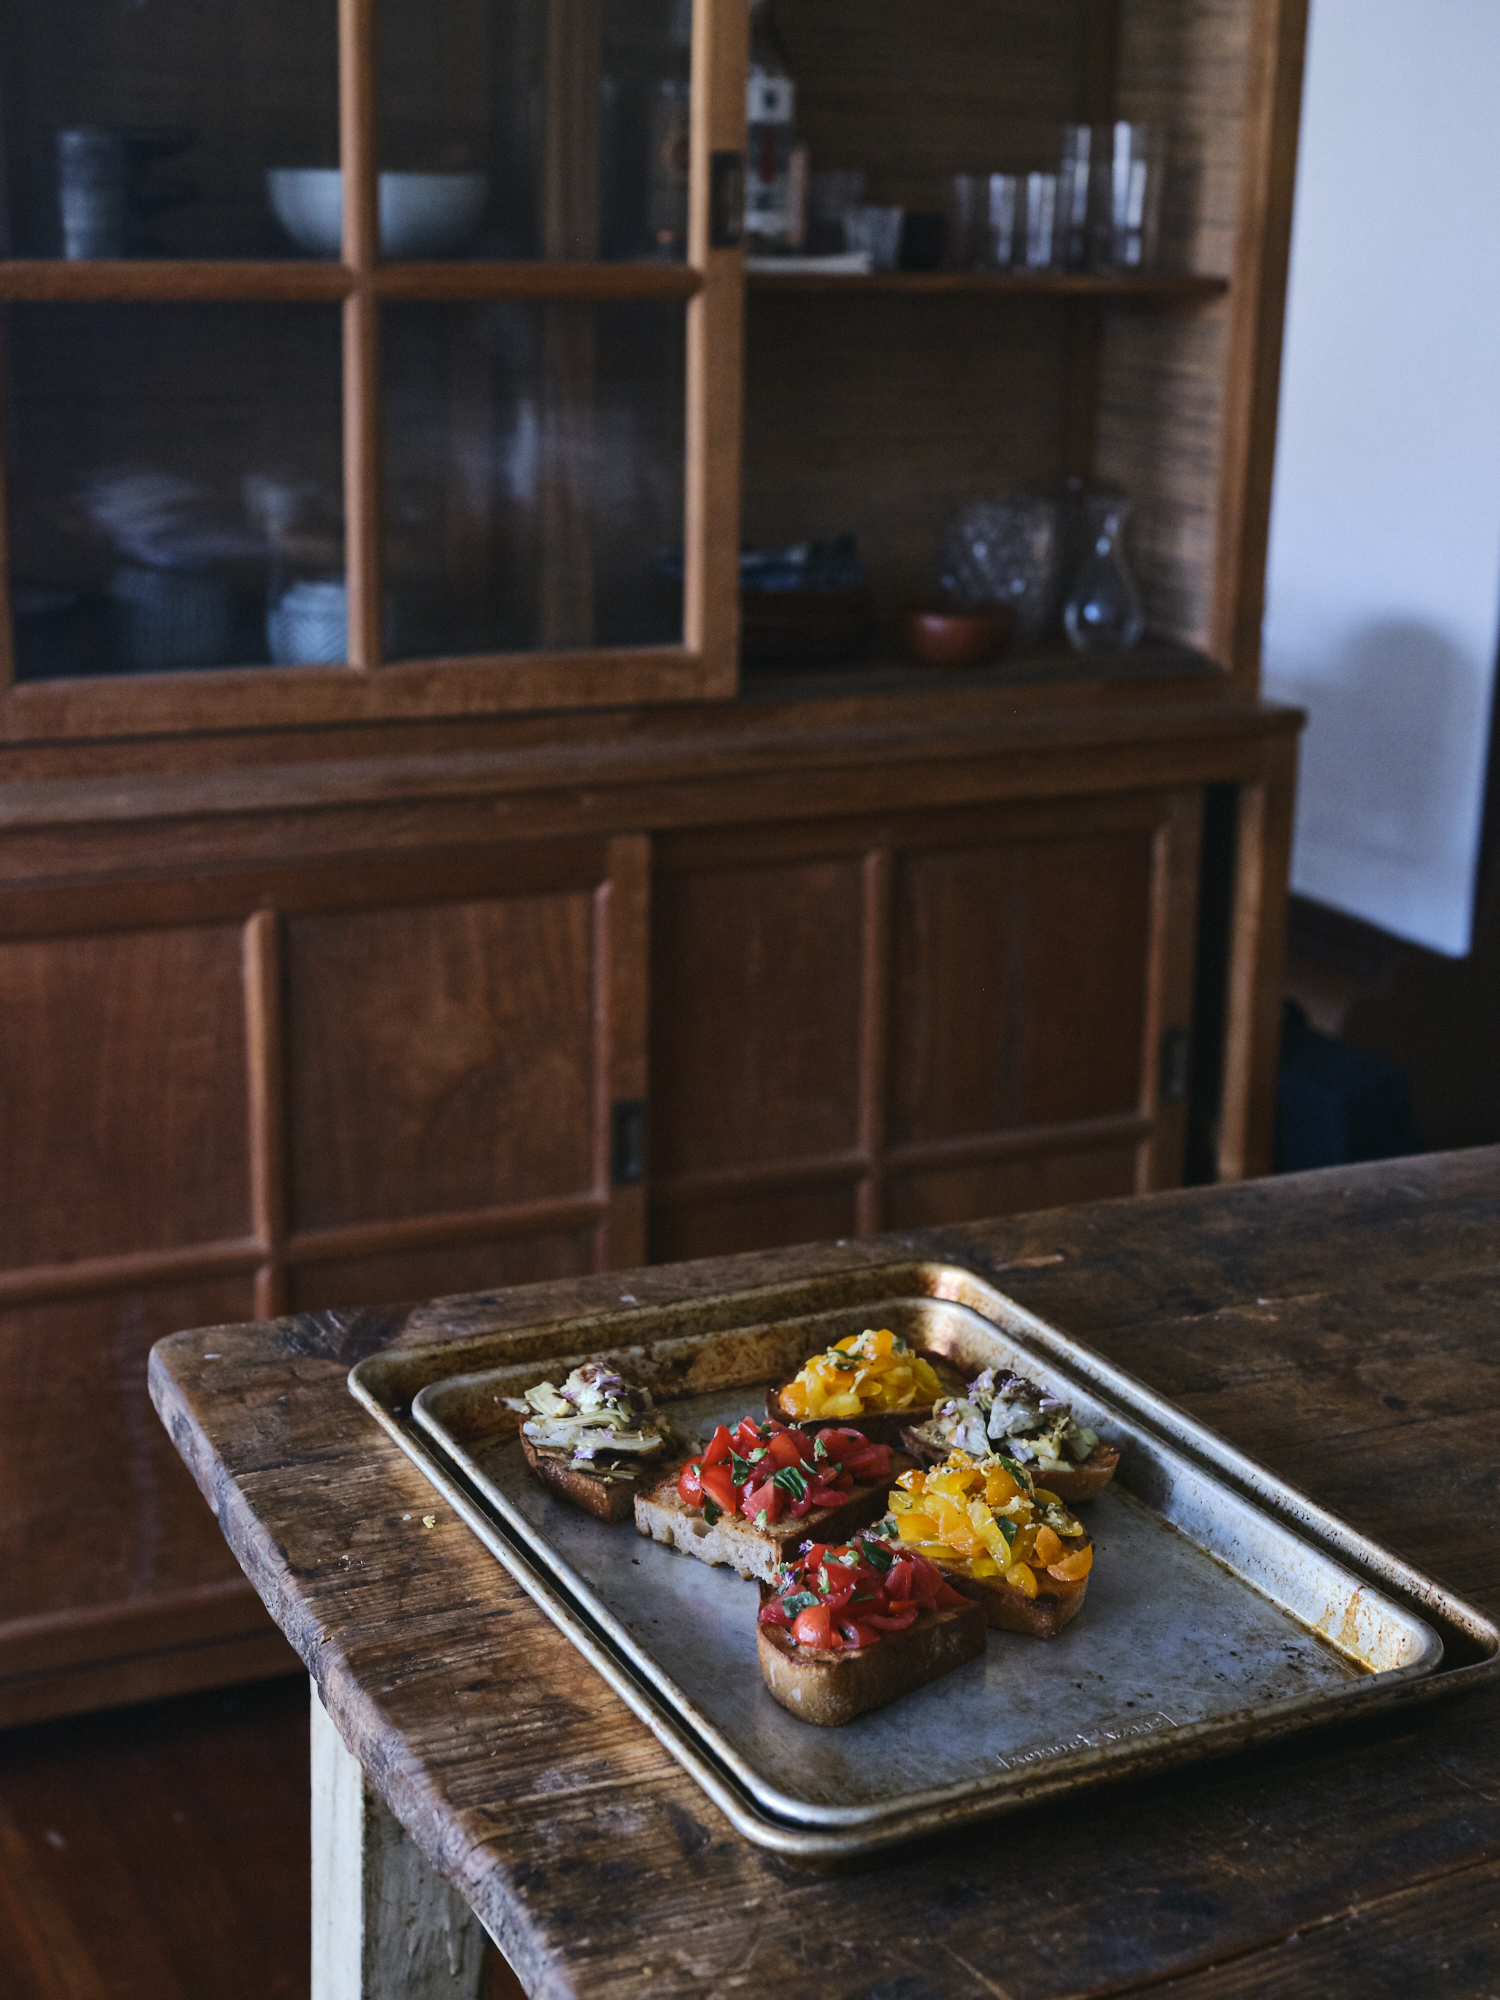
    I hope more than anything that this post is a reminder that the simplest food can be the best food. The tail end of a loaf of homemade sourdough, a few tomatoes from the garden along with a sprinkling of whatever herbs and herb flowers are there, garlic, and olive oil? Makes a perfect little meal, or party spread (if we were still having parties xx). 

    Continue reading Simple Bruschetta on 101 Cookbooks

101 Cookbooks https://ift.tt/3lwqxDU

Monday, August 24, 2020

Pumpkin and Rice Soup


The provisions were scarce when we got back from India the other night – my first winter squash of the year still on the counter, brown rice in the freezer, a bit of sad looking ginger on the windowsill, random nuts and seeds in the cupboard, herbs still going strong in the planter boxes out back, and a three week old knob of butter. That was pretty much it. But I felt exhausted after getting off the plane, and after forty hours of travel from door to door, I was determined cook at home. This simple soup was the first thing I made. It was silky textured, vibrant in color, and after a quick trip to the corner store in the morning for a bit of yogurt and a lemon – the lunchtime leftovers were even better. Particularly because of a finishing touch of a rosemary herby butter drizzle and lemon ginger pulp. I hope you find it as restorative as I did. Also! I wanted to tack some photos of one of my favorite experiences from India onto this post – the day Wayne and I had our photos taken on the street in Jaipur.

Pumpkin and Rice Soup Recipe

I’d read about this man, Tikam Chand. He has been taking pictures in the Old City of Jaipur using his grandfather’s camera for decades. And, upon arriving in Jaipur, we set out to find him. No luck, at first. But a couple of days passed, and finally, at a moment we weren’t looking, Wayne spotted a guy with an old camera on the sidewalk. We pulled over, hopped out, and it wasn’t ten seconds before we were in front of the camera. Sixty seconds and five frames had been snapped. Sit here, look here, you two together, and so forth. I was thinking it was very much like getting a dental x-ray. Much more fun, but still – all business. And it wasn’t Tikam with the camera, it was Surrender. I’m still not entirely clear on whether the two photographers share the camera, or if they’re related.

Pumpkin and Rice Soup RecipePumpkin and Rice Soup Recipe

So, you have your picture taken, and that’s when things start getting incredible. The processing is done right there on the street, and is finished in just a few minutes. A box in the back of the camera functions as the darkroom, negatives made from small sheets of hand-torn photo paper are slapped on a piece of wood, and shot again to make the positives. There’s a bucket for rinsing. Your completed pictures (and negatives if you splurge for them) are unceremoniously wrapped in a zig-zag folded sheet of the daily newspaper. It all goes down fast, and somewhat hilariously. For those of you who are interested in the specifics of how this works, I found this (Jonas also has some amazing Jaipur photos).

Pumpkin and Rice Soup Recipe

The head-to-toe shot of us up above might be my favorite shot ever of the two of us together.

Pumpkin and Rice Soup Recipe

An out of focus shot of the camera from the front. All eyes on Krishna. There’s no shutter, so to expose the frame, the red foil lens cap is moved to the side for a second or so. Part of what I loved about the whole experience was how unfussy, and non-technical it was. This guy had a good lens on a box set on a tripod that looked like a few sticks of driftwood bound together. And his photos are beautiful in a way you’ll never get with a new camera. Completely inspiring. 

Pumpkin and Rice Soup Recipe
Anyway! I have much more to share with you, in the meantime enjoy the soup. Trick it out with the good toppings, and I’m almost positive it’ll become a staple for you this fall/winter – or, at least, I hope so. xo -hPumpkin and Rice Soup Recipe

Continue reading Pumpkin and Rice Soup on 101 Cookbooks

101 Cookbooks https://ift.tt/2YvD4xw

Friday, August 21, 2020

Super Natural Vegan Sushi


I make this vegan sushi constantly. Especially anytime the weather is hot (read:now). It’s a recipe I planned to include in Super Natural Simple, but ended up leaving it out at the last minute. So! They’re making their appearance here where I have more room to talk through rices, rolling technique, and variations. And don’t worry, you don’t need any special tools to make it. This is homemade vegan sushi made with sweet potato fries, seasoned tofu, avocado, kale chips, and a whole grain sushi rice blend. A quick kiss of strong wasabi-spiked soy sauce is my preferred dipping sauce.
Super Natural Vegan Sushi

Let’s Talk About Sushi Rice

The key to your success here is choosing the appropriate rice. One way to be sure your sushi rolls hold together is to use white short-grain sushi rice. For this recipe you’ll combine cooked white sushi rice with other whole grains to “boost” it nutritionally. I’ve found that using a percentage of white rice really helps the rolls come together. More importantly, it helps them hold together, especially important for newbie sushi makers or if you’re having kids help out.

To cook the sushi rice, rinse the rice grains well before cooking. And if you have time to let them soak, even better. I use 2 cups of rice and 3 cups of water, and a bit of salt – scant 1/2 teaspoon. Simmer, covered, for 15 minutes. Allow to sit, covered, for 10 minutes more. You should end up with perfect chubby, sticky grains of rice you can then combine with other quinoa, cooked grains, pearled barley, black rice, or brown rice. I’ll outline the ratio I like below, but you can experiment. This organic sushi rice is an example of the kind of rice you’re after for the white sushi rice component.

Seasoning: Traditional sushi rice also uses a vinegar and sugar mixture as seasoning. Sometimes I add it to my cooked rice, other times I skip it. I know this might be a controversial admission, but I’d encourage you to think through a range of different ways you can season, spice, or boost your rice. The rice in these sushi rolls is plain and simple. That said, once you get the hang of the basics, you can experiment if you like! Use strong broth in place of the water in your rice. You can add spices (turmeric, curry blends, etc.) or ingredients like minced garlic, ginger, or scallions. Play around!
Vegan Sushi Ingredients

No Sushi Mat, No Problem!

You don’t need to have a special sushi mat to make sushi. I tend to use parchment paper. A clean linen or cotton towel can also work. If you want to make reverse roll (where the rice is on the outside, line your parchment paper with a sheet of plastic wrap. Do a layer of rice, next add the sheet of nori followed by more ingredients and/or rice. You can see my set up for getting ready to roll sushi in the photos below. Basically this is a long way of saying, you don’t need a bunch of specialty equipment to make vegetable or vegan sushi.Tofu in Skillet for Vegan Sushi

Vegan Sushi Filling Ideas

As I mention up above, I’m highlighting my favorite “everyday” vegan sushi roll for you today. I’ve made them twice this week! I’ll talk you through the main components:

  • Seasoned Tofu: Marinate slabs of tofu in a simple soy sauce, water, sesame-chile oil mixture. You can grill the tofu or cook it in a skillet (above) until golden. Cool a bit, and use a sharp knife to slice into matchsticks. You can see the sliced tofu pictured below.
  • Sweet Potato “Fries”: Slice sweet potatoes into fry shapes. Skins on or off, your choice. Toss with olive oil, sprinkle with salt, a bake at 400F until golden, flipping once or twice along the way. I tend to use the sweet potato version of these oven fries, but Wayne sometimes buys pre-cut sweet potato oven fries in a freezer bag, and those work great too.
  • Avocado: Thinly sliced, and perfectly ripe is what you’re after.
  • Kale Chips: I like the crunch you get from adding a few kale chips. Consider adding them a bonus if you have some on hand.
  • Sesame seeds: In your rolls, on your rolls, whatever.
  • Wildcards: If I have them sometimes I add a bit of cucumber, spicy tempeh crumble, or I’ll make the sushi with this tempeh in place of the tofu. I love this all-natural wasabi paste, and mix it with soy sauce, shoyu, or tamari as a dipping sauce.

As I mentioned, on the rice front, I like a rice blend with a good amount of whole grains in it, and have had the best results using half white sushi rice mixed well with half whole grain rice. For the whole grain rice portions, I like to cook short grain brown rice with a good amount of quinoa in it. That said, any whole grain blend should work with the white sushi rice. It’s sticky and helps everything hold together nicely.

How to Assemble Your Sushi

Sushi doesn’t have to be perfect to be delicious. Keep that in mind if you’re new to this. I thought I’d post a play-by-play photo series of how these rolls come together. Before we get into it, one thing that is helpful to know if your sushi rice is sticky and hard to work with is this. Use cold water to wet your hands or spatula. It’s a game changer.

Ready to roll: Once you have all your ingredients prepared it’s time to make sushi. What you see in the photo below is a sheet of parchment paper in place of a sushi mat. On top of that a 8×8-inch sheet of nori is placed. About a cup of rice is spread across the bottom third. Pat it down with a spatula so it holds together. Now add strips of avocado, sweet potato, tofu, and whatever else you’d like in your sushi.

Preparing Vegan Sushi on Sheet of Nori
Working from the bottom, use your sushi mat or parchment paper to start gently (but confidently!) guiding and shaping everything tightly into a roll. You can see how it starts in the photo below. 
Demonstration of How to Start Rolling Sushi
Use your extra fingers to keep ingredients in place and to pull the roll in toward the sushi mat. See photo below. The goal is shaping and keeping things tight. Keep guiding and rolling.
Demonstrating Sushi Tuck-and-Roll Technique
Once the rice and fillings have been encircled by the nori, compress and pull things tight one more time. I basically run my hands along the length of the roll making sure nothing is loose. 
Using Sushi Mat or Parchment Paper to Roll Sushi
Continue rolling to the end of the nori at this point, guiding the sushi mat or parchment paper out of the way as you go. See above and below examples.
Finished Vegan Sushi Roll
At this point you should be able cut the roll into pieces of sushi. Use your sharpest knife, and keep it clean as you go.
Super Natural Vegan Sushi Recipe
It’s a lot of fun to explore the world of vegetarian and vegan sushi. Next up on my list is to make a roll using sushi rice version of Bryant Terry’s Amazing Green Rice. Basically, I imagine it will be very similar to this roll, but using his blender technique to green-ify the rice. Or maybe as we make our way into the fall a mushroom-centric roll. Excited to see your versions!

Continue reading Super Natural Vegan Sushi on 101 Cookbooks

101 Cookbooks https://ift.tt/2QcYVVZ

Thursday, August 20, 2020

Iced Green Tea


Here’s the story behind my favorite iced green tea. There was a man behind me at the grocery store the other day. I was in the bulk section surrounded by large jars of dried herbs, tea blends, spices, and sea vegetables. The man inquired about a rose & green tea blend, and the young woman overseeing the teas replied that she thought they used to carry a black tea & rose blend, but not green tea & rose. 
Iced Green Tea

Green Tea Inspiration

Now, I drink a good amount of green tea, and thought the green tea with rose combination sounded particularly nice. I imagined it iced, and made a pitcher as soon as I got home using green tea I had from my trip to Tokyo, along with rose petals I had on hand. Cold-brewed, accented with rose and a bit of whole coriander – it’s a warm weather refresher.Iced Green Tea

Iced Green Tea Brewing Technique

A couple notes related to my brewing technique. It’s a hybrid, mostly cold-brew approach. I hit the leaves with a splash of just-shy-of-hot (not boiling) water, to wake up the leaves. This also extracts some of the healthy antioxidants from the tea leaves – straight cold brewing (with out the hot water splash) has less antioxidant activity. Count to 10 or so, and then finish up with cold water. This kills the heat, keeps the extraction smooth and slow, and prevents over cooking, or over brewing. The difference between a cold brew green tea and hot brew is dramatic, both wonderful in their own right, but for an iced tea like this I prefer less vegetable / cooked notes.
Iced Green Tea
The green tea I used pictured below. Iced Green Tea

I use whatever green tea I have on hand, but I tend to prefer certain types over others. When I’m doing iced green tea, a favorite is loose leaf Japanese sencha (above). The color is beautiful, and it brews vibrant, smooth, and clean. Enjoy! -h

Continue reading Iced Green Tea on 101 Cookbooks

101 Cookbooks https://ift.tt/2CLISeV

Wednesday, August 19, 2020

Summer Berry Crisp


Heading into the holiday weekend, I thought I’d share this variation of my favorite summer berry crisp. I made it recently to finish a dinner celebrating my good friend Chanda’s birthday. Blackberries, strawberries, and cherries cook into a thick, jammy, wine-spiked fruit sludge beneath a crispy, oat-flecked top. It’s the good stuff, and silly simple. 
Summer Berry Crisp Recipe
If you’re heading out to do some camping, I bet you could do a brilliant campfire version in a cast iron Dutch oven. There’s a version of it in my last book, but I doubled-down on the topping for this one. No one ever complains about too much of the crumble top ;)…
Summer Berry Crisp Recipe
If you have an abundance of berries, this crisp is even better with a scoop of berry swirl ice cream.

Continue reading Summer Berry Crisp on 101 Cookbooks

101 Cookbooks https://ift.tt/2DZSYtm